


Seattle Microcement Bathrooms Built the Right Way
Microcement only performs as well as the process behind it. Our 7-step method ensures every surface is properly prepared, waterproofed, and sealed so your bathroom looks modern and continues to perform long after the project is complete.

What Exactly Is a Microcement Bathroom?
Microcement isn’t a shortcut or a surface you roll on and hope for the best.
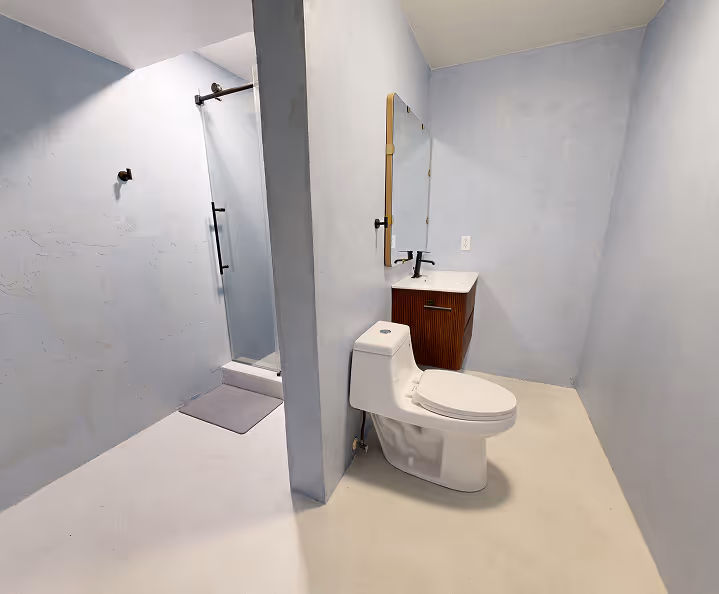
A microcement bathroom uses a thin, hand applied cement based finish to create a continuous surface across walls, showers, floors, and built in features. There are no grout lines breaking up the space, which gives the room a cleaner and more open feel.
Microcement is not a paint or a shortcut coating.
Because it's applied by hand, every surface has subtle movement and character. We think it makes the space feels intentional and refined rather than flat or factory made.
Visually larger bathrooms
With fewer lines and no busy tile patterns, the eye reads the bathroom as one continuous surface.
This makes smaller or older bathrooms feel more open and less cluttered without changing the footprint.

Calming, modern design
Microcement creates a soft, matte finish with subtle movement rather than repeating patterns.
It pairs naturally with warm woods, matte black fixtures, and natural light, which is why it is often used in spa inspired spaces.

Less daily maintenance
With no grout lines to trap soap scum or mildew, everyday cleaning is straightforward.
A quick wipe with a microfiber cloth, warm water, and mild cleaner is usually all it takes to keep the surface looking clean.

Underneath the Finish Is Where the Magic Happens.
This finish depends entirely on proper preparation, correct primers, stable substrates, and a proven waterproofing system behind it. When those pieces are done correctly, microcement becomes one of the most versatile and visually calm finishes you can use in a bathroom.
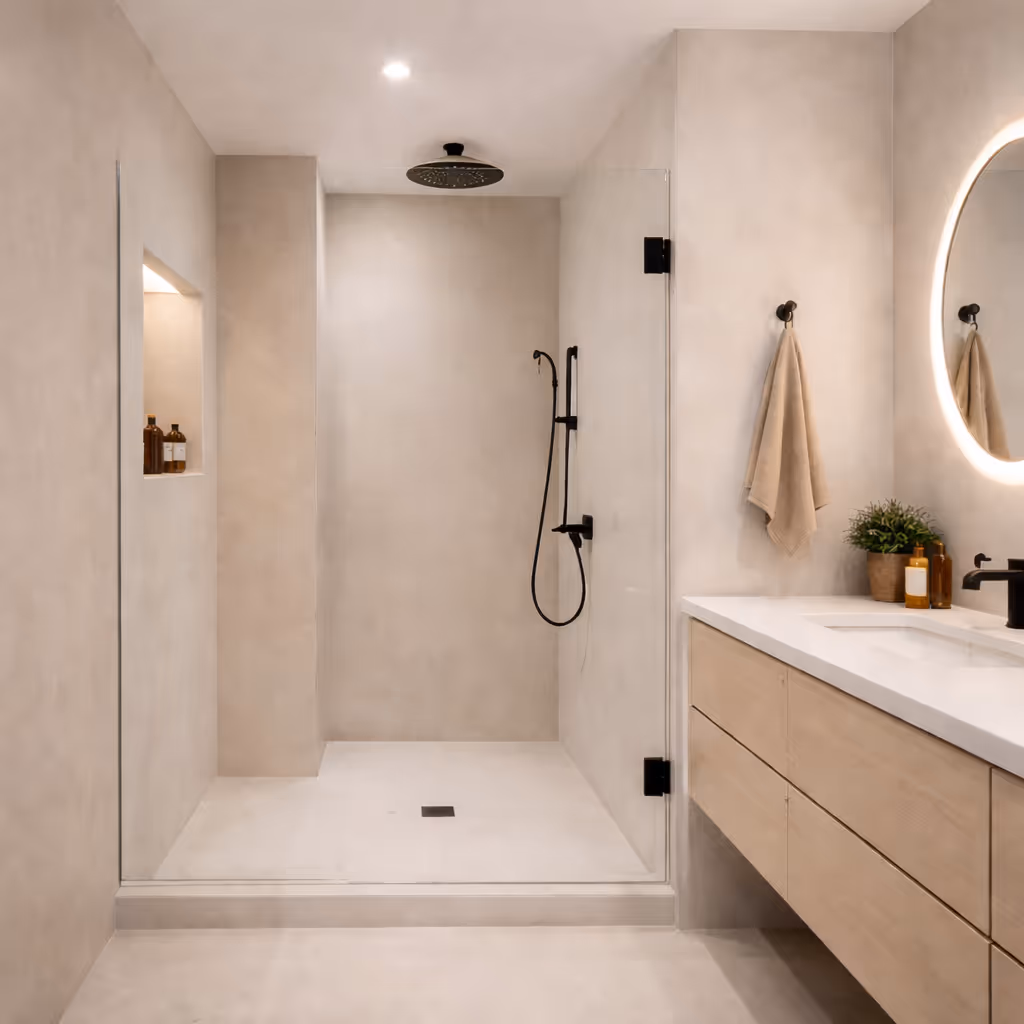
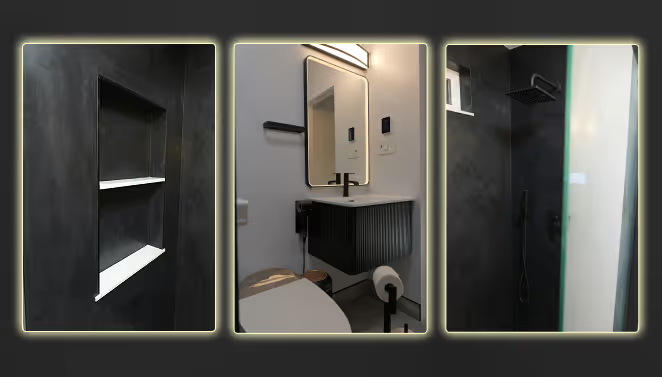
Microcement Showers & Wet Areas
Walls, niches, & ceilings
We can wrap shower walls, recessed niches, benches, and even ceilings in the same continuous finish. The result feels cohesive and spa-like without making the space feel dark, boxed in, or heavy.
Custom shower pans
This finish can be applied over properly sloped shower bases to create a unified look from floor to wall. Water is still directed exactly where it needs to go, but without visual breaks or bulky transitions.
Waterproofing built in from day one
Protection happens underneath the surface using proven shower waterproofing systems designed for wet environments. Once that foundation is complete, the finish is applied and sealed so the shower is protected across multiple layers, not just the surface you see.

Soft, Matte Finishes
A shower does not need a glossy surface to perform well in wet areas. Matte and satin finishes are commonly used because they keep light soft, reduce glare, and maintain a calm, modern look that feels comfortable rather than clinical.
Fewer Joints, Fewer Leaks
Traditional tile relies on dozens of grout lines, which are often the first places moisture problems begin. A continuous surface reduces vulnerable joints and shifts the focus to clean transitions, proper drainage, and well detailed corners.
"I've learned that a good shower is built from the inside out. If the waterproofing, slopes, and prep are right, the surface will do its job. When those are wrong, no finish can save it."


Floors That Feel and Perform as Good as They Look.
Bathroom floors need to handle water, daily foot traffic, and temperature changes without becoming slippery or fragile. This is where texture, preparation, and finish matter just as much as appearance.
When those elements are handled correctly, the floor becomes one of the most comfortable and dependable parts of the bathroom.
The real test is not the reveal day. It's how it feels on a rainy Tuesday when you're rushing in and out the door. A continuous floor surface is designed to make those everyday moments easier and more comfortable.
This is our favorite place to add heated floors. They pair perfectly with this surface and are surprisingly affordable. Once you have them, you will wonder how you ever lived without them.

What Does a Microcement Bathroom Cost?
Every project is a little different, but most Seattle microcement bathrooms land in the ranges below. During your consultation, we’ll talk through your space, priorities, and budget so we can recommend the right approach.
$8,000–$15,000
Ideal if you’re keeping your existing layout but want to refresh walls and shower surfaces with microcement.
$18,000–$35,000+
Best for a full re‑think: new surfaces, fixtures, lighting, and layout adjustments built around a seamless microcement finish.
Custom Estimate
Spacious primary suites, complex layouts, or integrated dressing areas are priced after an on‑site visit and design consult.
These ranges are for ballpark planning only and may shift with material selections, plumbing or electrical work, and structural changes. We’ll always walk you through a clear, line‑by‑line proposal before work begins.

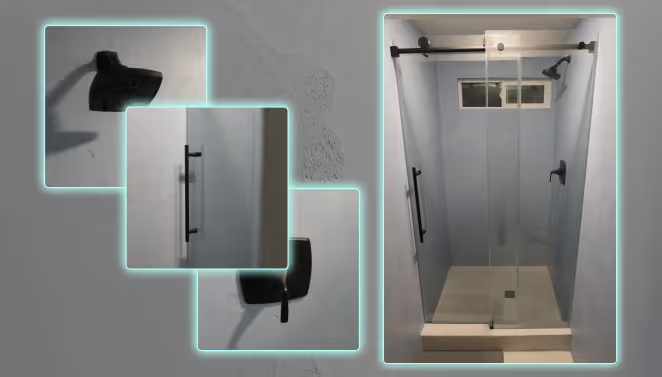
Microcement vs. Traditional Tile in Bathrooms
Tile is familiar. Microcement is different. Here’s how they stack up when you’re thinking about a bathroom you’ll actually live in every day.
Microcement Bathroom

Traditional Tiled Bathroom
How the Process Works
A great result starts long before the finish goes on. Our process focuses on preparation, patience, and doing each step in the right order so the surface performs the way it should.
Clean the surface
We start by thoroughly cleaning the area to remove dust, grease, and any contaminants that could interfere with adhesion.
Repair and stabilize
Cracks, holes, and loose areas are repaired so the substrate is solid and stable. This prevents movement or weak spots from showing through later.
Confirm dryness
Before moving forward, we make sure the surface is completely dry and moisture free. Applying any finish over trapped moisture leads to problems down the line.
Light sanding if needed
Smooth or sealed surfaces are lightly roughened so the material can bond properly.
Apply the primer
We apply the appropriate primer to promote proper adhesion between the surface and the finish.
Apply two coats
The finish is applied by hand in two thin coats, with twelve hours between each layer. This allows the surface to build strength and consistency.
Seal and cure
After twenty four hours, the surface is sealed to protect it for daily bathroom use. Bathrooms and showers are typically ready for use within twenty four to forty eight hours, depending on temperature.
Final checks
Before we call a job complete, we perform water testing, check drainage, confirm ventilation, and make sure everything functions as it should.
Timeline at a Glance
Most projects take one to three weeks, depending on size and scope. We would rather take the time needed to do it right than rush a finish that needs to last.
FAQs
We tried to think of everything, but If you have unanswered questions, just give us a call.
The waterproofing happens underneath the surface using proven shower systems designed for wet environments. Once that foundation is in place, the finish is applied and sealed for daily use. This layered approach is what allows showers to perform long term.
Most bathrooms or showers can be used within twenty four to forty eight hours after sealing, depending on temperature and conditions.
Most projects take one to three weeks. The timeline depends on the size of the bathroom, how many surfaces are included, and what we uncover during preparation.
Absolutely. Many of our favorite bathrooms mix materials—for example, a microcement shower and walls with a wood vanity and stone countertop, or a microcement feature wall paired with simple floor tile. We’ll help you strike the right balance.
Cracking is usually caused by movement, moisture, or improper preparation underneath the surface. That is why we spend so much time on prep and substrate conditions. If a space is not a good candidate, we will tell you upfront.
Day to day care is simple. Use a microfiber cloth, warm water, and mild cleaning solutions. Avoid harsh chemicals or abrasive tools. Resealing every two to three years helps maintain protection and appearance.
Avoid harsh or acidic cleaners and abrasive sponges. These can damage the sealer and shorten the life of the surface.
Yes, repairs are possible. To keep a seamless look, repairs usually require resurfacing the full wall rather than spot patches. We will always explain repair options clearly if the need ever comes up.
Most failures come from improper preparation, trapped moisture, or rushing the process. The surface itself is rarely the problem when the system underneath is built correctly.
The space needs to be dry and around seventy degrees during installation and curing. Interior bathrooms are protected from UV exposure, and proper ventilation is key for long term performance.
Yes. We provide a one year workmanship warranty on all installations. However, using harsh chemicals or abrasive tools on the surface can void the warranty.