


Seamless Microcement Showers Built For Seattle Living
Stop scrubbing grout and start enjoying a spa-like sanctuary. We replace your dated, clunky tub with a hand-applied, 100% waterproof microcement shower that makes your bathroom feel larger, cleaner, and more intentional.
The Typical Shower Is a Maintenance Trap
The grout feels moldy and hard to clean.
The tub feels bulky and tricky to navigate.
The tile feels busy and cluttered visually.
The walls feel leaky and anxiety inducing.
We Build Showers From the Inside Out.
We are Seattle’s specialized microcement team, but we don't just "apply a finish." We are systems-driven contractors who believe a beautiful surface is worthless without a bulletproof foundation.
Our 7-Step Method ensures that your bathroom isn't just a visual upgrade, but a long-term structural win.
No More Mold!
Out With the Old!
Bright and Bold!
Guests Behold!
Why Microcement Works So Well in a Shower
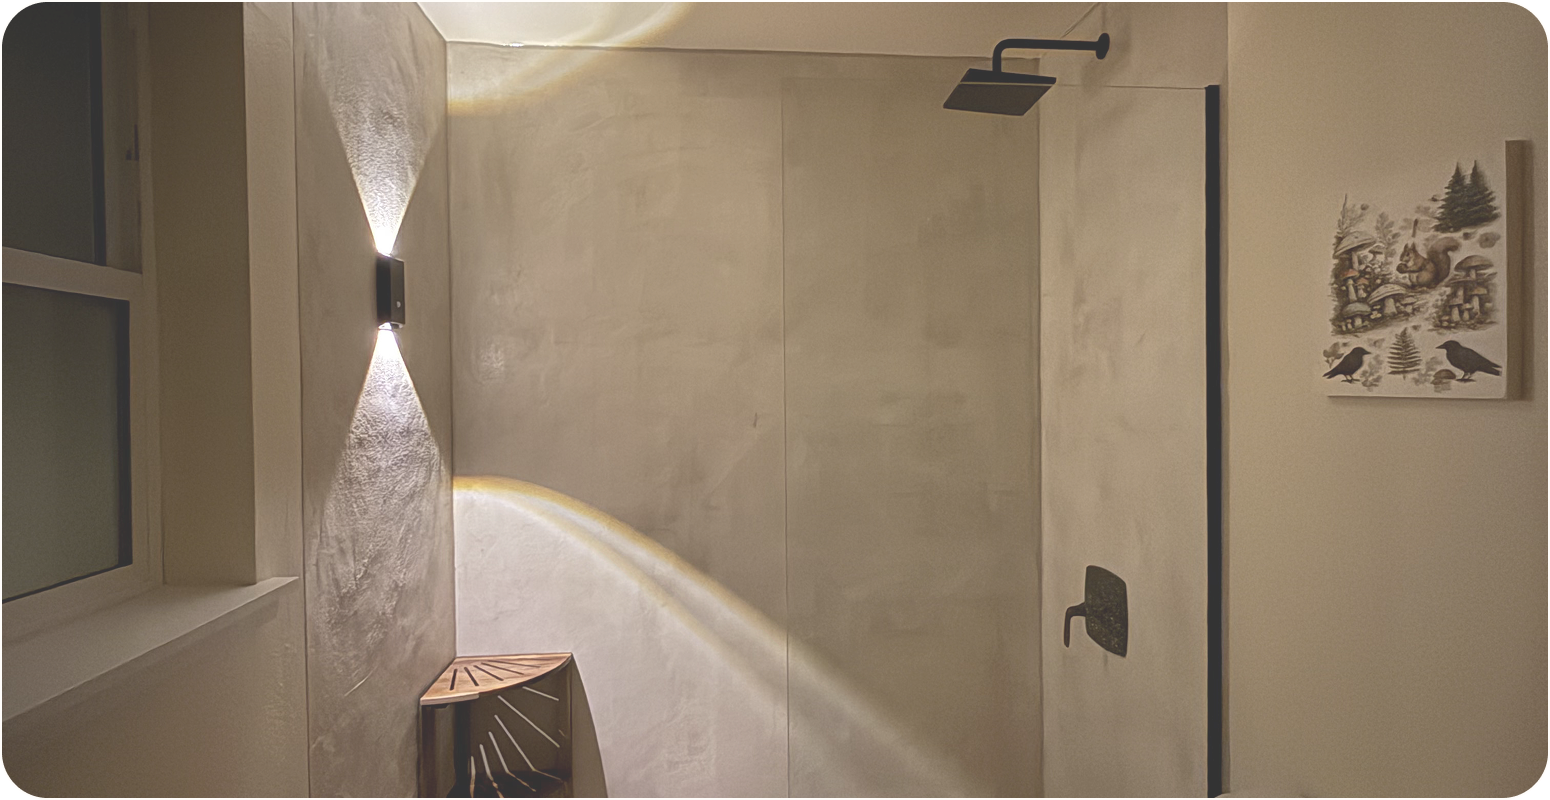
Microcement is one of the few finishes that can cover every surface in a shower without a single grout line. Walls, floor, ceiling, niches, benches, even the shower pan itself can all be finished in one continuous surface.
That means there are no joints collecting soap scum. No grout lines turning dark in the corners. No caulk seams that peel after a year.
Because the finish is applied by hand in thin layers, it adds only two to three millimeters of thickness. You are not losing space the way you would with thick tile and mortar. The texture is soft and matte with subtle movement from the trowel work, and it makes even small showers feel calm, open, and intentional.
What's Underneath Matters More Than What You See
Here is something most people do not realize about a microcement shower: the finish itself is not what keeps water out. The waterproofing system underneath is.
We build every shower with a dedicated waterproofing assembly before a single coat of microcement goes on.
The finish on top is sealed with a polyurethane topcoat that resists water, soap, and cleaning products. But even if that sealer wears over time, the waterproofing membrane underneath continues to protect.
Sheet-applied membranes
Bonded directly to the substrate across all wet surfaces, creating a continuous waterproof barrier behind the finish.
Pre-formed corner seals
At every wall-to-floor and wall-to-wall connection, where most shower failures begin.
Pipe and valve seals
Watertight seals at the showerhead, mixing valve, and any other penetrations through the membrane.
Sloped shower pan
Custom mortar bed pan with PVC liner, sloped precisely to direct water to the drain.
The 24-hour flood test
We test every shower pan with a 24-hour flood test before any finish goes on. If it holds, we move forward. If it does not, we fix it. That one step catches problems before they become expensive ones, and it is the line between a shower that lasts twenty years and one that fails in two.

Tub-to-Shower Conversions
If you've got a tub-shower combo that feels cramped, hard to step into, or impossible to keep clean, you are not alone. It is one of the most common reasons Seattle homeowners call us.
A tub-to-shower conversion replaces the old bathtub with an open, walk-in shower. When you combine that layout change with a microcement finish, the result is a completely different bathroom.
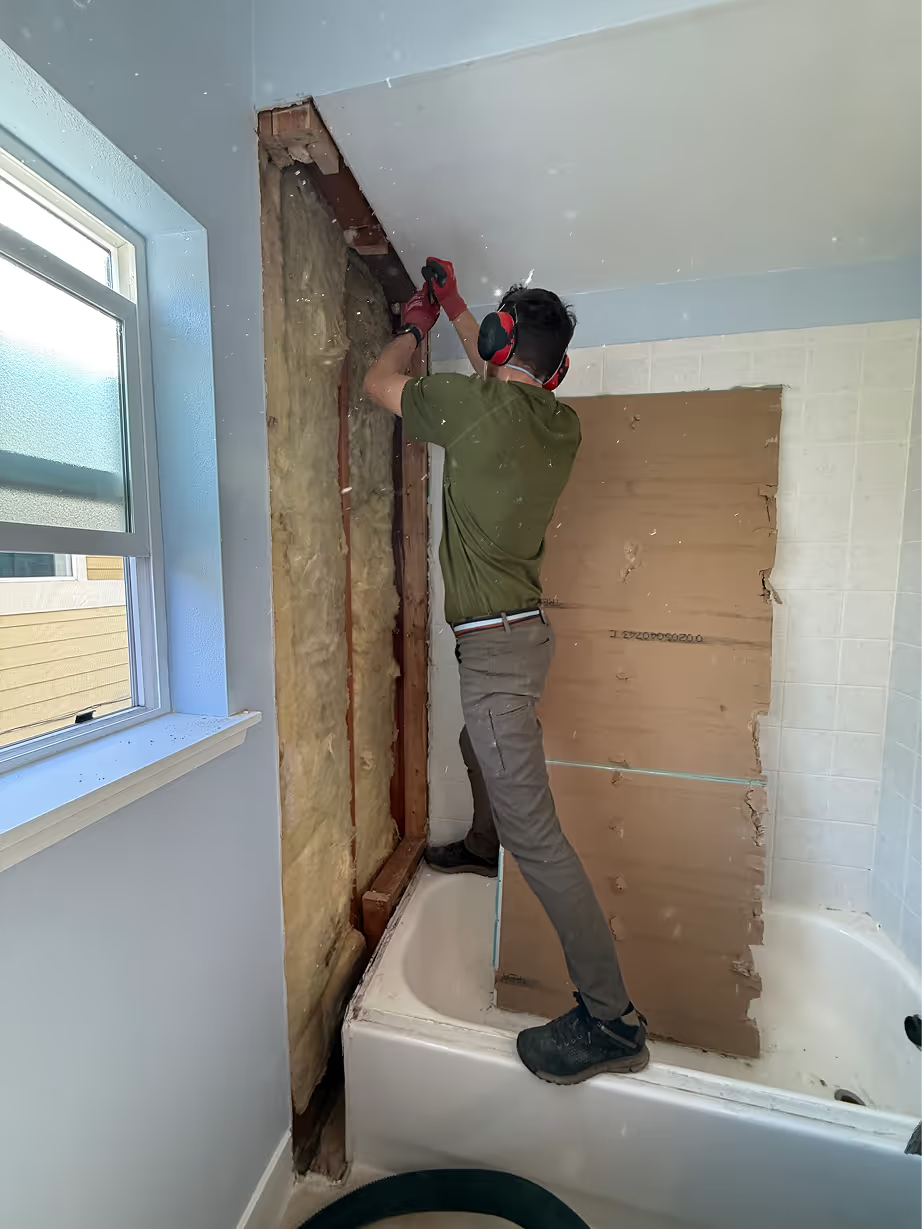
Demo and removal
We pull out the existing tub, surround, and any failing materials down to the studs. No patching over old problems.
New shower pan
A custom mortar-bed shower pan with PVC liner, sloped precisely to drain. The structural foundation of the new shower.
Waterproofing
Membranes, corner seals, pipe seals, and a full 24-hour flood test before we move forward.
Microcement application
Two coats applied by hand across walls and floor, then carried out onto the bathroom floor for a continuous, threshold-free surface.
Sealing
A matte polyurethane topcoat protects the finish for daily use and resists water, soap, and cleaning products.
Fixtures and glass
New valve trim, showerhead, and a frameless glass panel or door to complete the space.
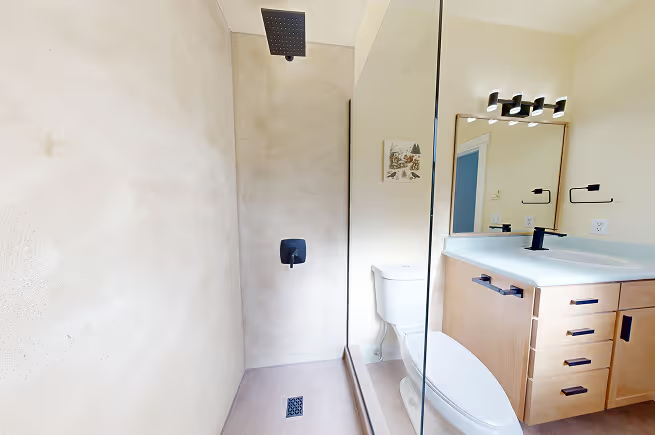
See it in action
Take a look at our West Seattle tub-to-shower conversion, where we turned a dated tub-shower combo in a rental property into a walk-in microcement shower that is easier to clean, easier to rent, and built to last. The whole project ran two to three weeks from demo to glass.
Glass Panel and Enclosure Options
The glass you choose affects how the shower feels just as much as the finish on the walls. With microcement, we lean toward minimal glass that lets the continuous surface do the talking.

Fixed frameless panel
Our go-to for most microcement showers. A single pane of tempered glass, usually 3/8-inch thick, mounted with minimal hardware. No door, no track, no frame. It keeps water in without closing the space off, and the microcement texture stays visible from anywhere in the bathroom.
Frameless pivot door
When the shower layout needs a full enclosure, a frameless pivot door keeps the look clean. The glass swings open on a hinge without the visual weight of a frame or track. Works well for larger showers or corner configurations.
No glass at all
For open walk-in showers with a wide entry and proper drainage, some homeowners skip the glass entirely. The microcement finish is fully waterproof and sealed, so as long as the floor slope and drain placement are right, an open layout works beautifully.
Hardware that pairs well
We recommend matte black or brushed gold hardware to complement the microcement finish. Chrome works too, but the warmth of matte black against a soft gray or cream microcement is hard to beat.
Fixture Pairing
The beauty of a microcement shower is that the finish is understated. That means the fixtures get to stand out. Here is what we see working best in our Seattle projects.
Rain showerheads with a handheld wand
The rain head delivers that spa feel, and the handheld wand on a slide bar makes daily use practical. Matte black finishes are popular right now and photograph well against lighter microcement tones.
Thermostatic shower valves
These let you set your preferred temperature and keep it consistent across uses. If you are building a new shower from scratch, it is worth upgrading from a standard pressure-balance valve.
Built-in niches
We can form niches directly into the microcement walls so they sit flush and continuous with the surrounding surface. No tile trim, no plastic shelves, no adhesive caddies.
Linear drains
A linear drain along the back wall or entry of the shower creates a cleaner look and lets the floor slope in one direction rather than four. That matters for microcement because a simpler slope means a smoother, more even surface.
How the Process Works
A great result starts long before the finish goes on. Our process focuses on preparation, patience, and doing each step in the right order so the surface performs the way it should.
Clean the surface
We strip back the shower area to a clean starting point, removing any old adhesive, grout residue, paint, or contaminants that could interfere with the bond.
Repair and stabilize
Cracks, soft spots, and uneven areas are repaired so the substrate is solid throughout. In showers, this also means confirming the wall framing and backer board are structurally sound and free of moisture damage.
Waterproof the shower zone
This is where shower projects differ from standard rooms. We install sheet-applied waterproofing membranes across all wet surfaces, seal every corner and pipe penetration, and build or confirm a properly sloped shower pan. A full 24-hour flood test is completed before we move forward.
Light sanding if needed
Any smooth or sealed surfaces are lightly roughened to give the primer something to grip.
Apply the primer
A bonding primer is applied across all surfaces to promote proper adhesion between the waterproofing layer and the microcement.
Apply two coats
The finish is applied by hand in two thin coats with twelve hours between each layer. In a shower, we pay extra attention to corners, drain transitions, and niche edges to keep the surface continuous and clean.
Seal and cure
After twenty-four hours, we apply a two-component polyurethane sealer across all shower surfaces. This topcoat is what makes the finish resistant to water, soap, and daily cleaning products. The shower is typically ready for use within twenty-four to forty-eight hours after sealing, depending on temperature and ventilation.
Final checks
Before we call a job complete, we perform water testing, check drainage, confirm ventilation, and make sure everything functions as it should.
Timeline at a Glance
Most projects take one to three weeks, depending on size and scope. We would rather take the time needed to do it right than rush a finish that needs to last.
FAQs
We tried to think of everything, but If you have unanswered questions, just give us a call.
The microcement itself isn't what keeps water out. The waterproofing system underneath is. We install sheet-applied membranes, corner seals, and pipe seals across the entire shower zone before any microcement is applied. Then the finished surface is sealed with a polyurethane topcoat. It's a layered system where each layer has a job, and the shower is protected even if the top sealer eventually needs refreshing.
Most showers can be used within twenty-four to forty-eight hours after the final seal coat is applied. The exact time depends on temperature and ventilation in the space. We'll give you a specific timeline before we finish.
Typically two to three weeks. That includes demo (if needed), waterproofing, microcement application, sealing, fixture installation, and glass. Projects that involve a tub-to-shower conversion or shower pan construction tend to land on the longer end of that range.
In many cases, yes. If the existing tile is stable, well-adhered, and not showing signs of moisture damage behind it, microcement can be applied over top after proper cleaning, joint leveling, and priming. If the tile is cracked, hollow-sounding, or loose, we'll remove it and work from a fresh substrate. We assess this on a project-by-project basis.
Cracking happens when the substrate moves, moisture gets trapped underneath, or the prep work was cut short. We mitigate all three by repairing the substrate, waterproofing the full shower zone, and allowing proper cure times between coats. If a space isn't a good candidate for microcement, we'll tell you upfront.
Wipe it down after use with a microfiber cloth or squeegee to prevent water spots. For deeper cleaning, use warm water and a mild, pH-neutral cleaner. Avoid bleach, vinegar, abrasive sponges, or anything with acid. We recommend resealing every two to three years to keep the protective layer performing at its best.
Skip bleach, vinegar, and any acidic or abrasive products. They break down the polyurethane sealer and shorten the life of the finish. Stick with pH-neutral cleaners and a soft microfiber cloth or squeegee.
Yes. To keep the seamless look, repairs typically mean resurfacing the affected wall rather than spot patching. We walk you through repair options whenever the need comes up.
Most failures trace back to one of three things: improper substrate prep, trapped moisture in the system, or rushing the cure times between coats. The microcement surface itself is rarely the problem when the system underneath is built correctly.
The space needs to be dry and around seventy degrees during installation and curing. Interior bathrooms are protected from UV exposure, and proper ventilation (an exhaust fan rated for your bathroom size) is key for long-term performance.
Yes. We provide a one-year workmanship warranty on all installations. Using harsh chemicals or abrasive cleaning tools on the surface can void the warranty, so we'll walk you through the care guidelines when the project wraps up.