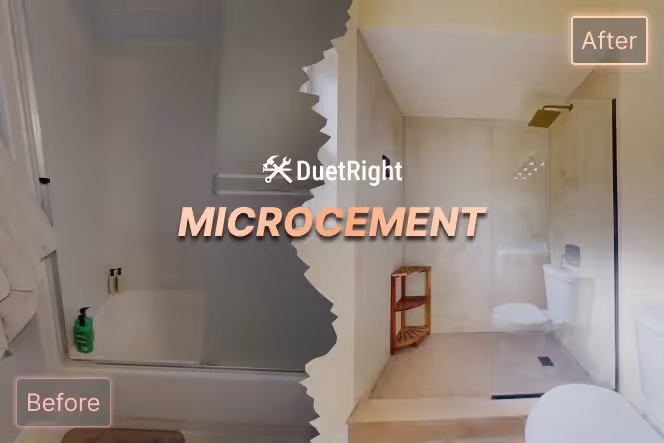
Reimagining a Kirkland Bathroom With Microcement
See how microcement can turn a dated bathroom into a seamless, spa-like space that feels brighter, calmer, and easier to maintain.

If you’ve ever stared at your bathroom and thought, “This could feel so much better…” you’ll understand exactly where this Kirkland project began.
The homeowner didn’t want something flashy or overdone. They simply wanted a bath that felt peaceful, modern, and fresh every time they walked in.
No grout lines, no constant scrubbing, no patchwork of tile and trim. Just… calm.
That’s what led us straight to microcement.
Microcement has been a staple in modern European design for years, and it’s finally becoming a favorite in the U.S. because of how clean, seamless, and effortlessly refined it looks.
Think of it as a thin, handcrafted coating that wraps your interior in one continuous surface: walls, floors, even the shower, all without a single grout line to break the flow.
And in this project, it completely transformed the space!
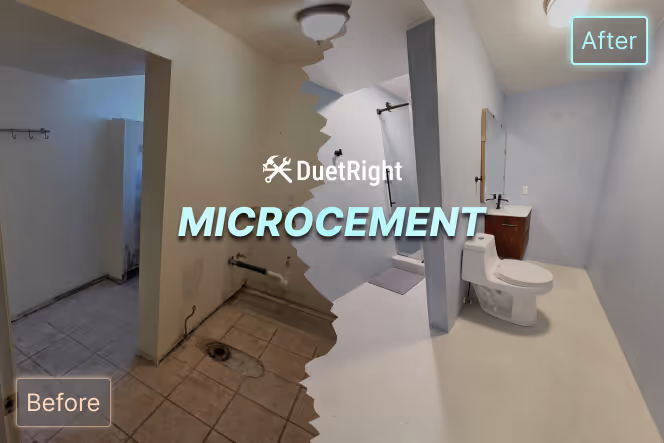
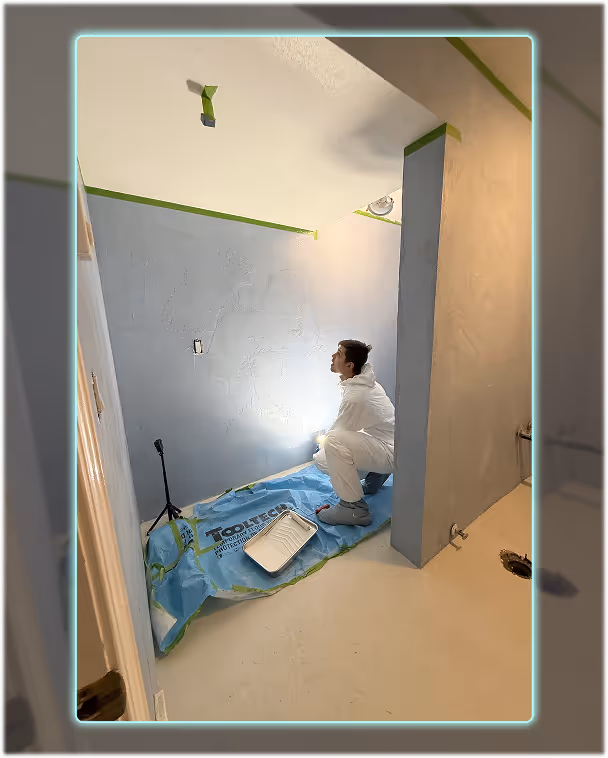
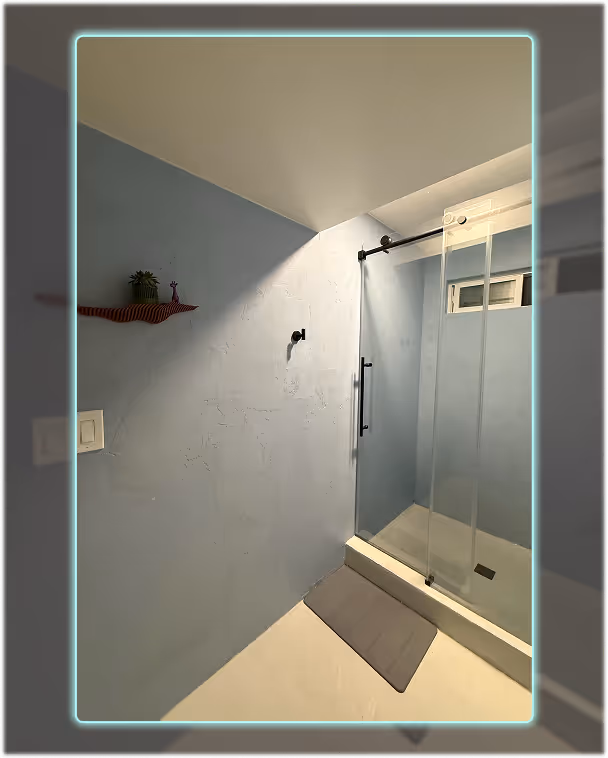
Seeing the Bathroom Before the Remodel
Let’s be honest: the original bathroom had seen better days.
The tile made the room appear cramped. The ceiling in the shower had visible mold. The surfaces were mismatched, the fixtures were dated, and everything just felt… tired.
You know that moment when you walk into a room and it just doesn’t match the way you want your home to feel?
That was the vibe here.

But the homeowner had a clear vision: a small refresh that felt bigger, brighter, and more intentional. They wanted a space that felt like a reset, something minimalist and peaceful from the moment you stepped inside.
That’s where this trendy surface shines!
In tight rooms, it does something magical: it visually erases boundaries.
No tile transitions. No busy patterns. Just a minimal, continuous surface that instantly makes the room seem larger.
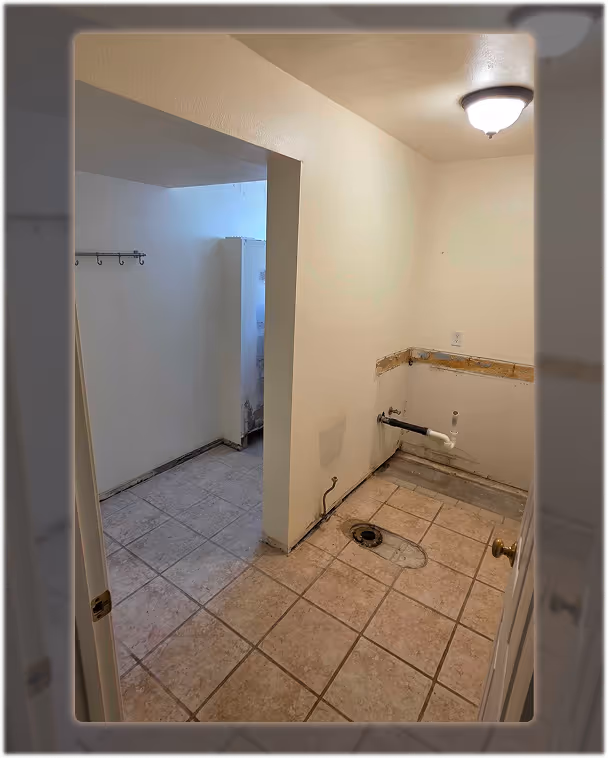
To make that happen, we needed to set the stage.
We cleared out the old materials, smoothed uneven areas, improved ventilation, and made sure every surface was ready for a thin, smooth coating. It’s the kind of behind the scenes work you don’t always think about, but it’s what makes the final finish look flawless.
Once the new wash area had a clean slate, the transformation could truly begin!
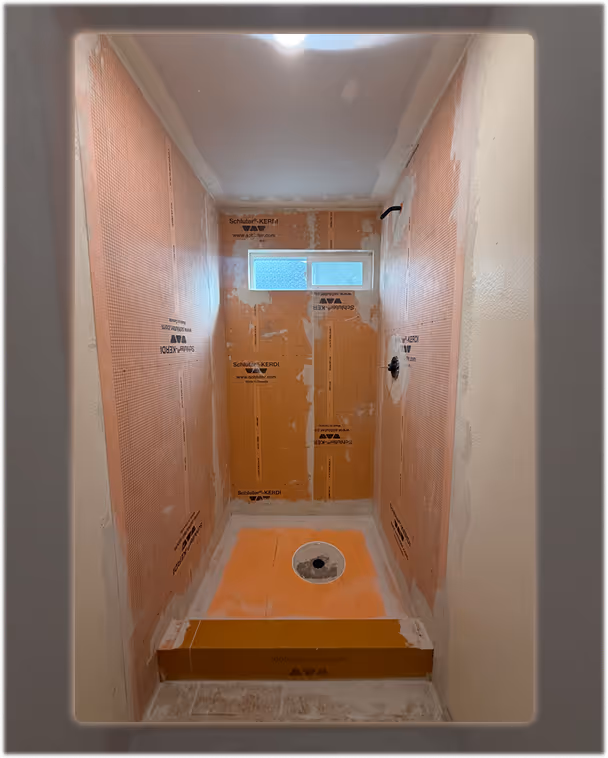
Preparing the Space for a Seamless Finish
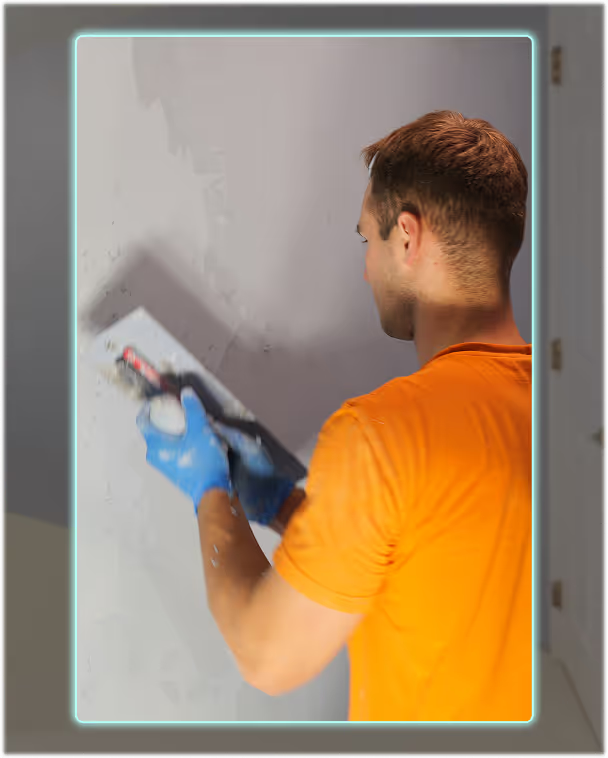
Microcement only looks as good as what’s underneath it, which is why preparation is everything.
We smoothed and reshaped the walls, filled low spots, cleaned corners, patched old areas, and sanded until every surface felt uniform.
If you’ve ever prepped a wall for paint, you know how satisfying it is to get it perfectly smooth.
Now imagine that… but with the knowledge that the final finish will highlight every detail. It’s worth doing right! (They don't call us DuetRight for nothing 😉)
We also made sure the room’s airflow was set up properly. Microcement cures best in a balanced environment, especially when you want that soft, matte texture it’s known for.
And since the shower was getting microcement too, we checked every inch to make sure it would bond neaty and stay durable.
Once everything was aligned, sanded, and ready, it finally felt like we were standing inside the “before” version of a room that was about to become something completely different.
Applying the Microcement and Watching the Room Transform

Here’s the part that never gets old.
The first layers of microcement go on like soft, smooth strokes, and even in those early passes, you can sense the room changing!
The hand troweled texture adds character, depth, and a warm feel that tile just can’t match.
When microcement is applied correctly, it has a gentle movement to it. Not the flatness of paint. Not the repetition of tile. Something in between, a natural, handcrafted surface that catches the light in subtle, beautiful ways.
It’s calm. It’s intentional. And most importantly, it’s seamless!
We applied the base coats first, letting each one dry before the next. Then came the finishing coats, thin but transformative.
This is where the color becomes even, the matte texture settles in, and the bathroom starts to look like the ones you save on Pinterest boards.
Once the final coat cured, we sealed the surface to make it waterproof, stain resistant, and ready for real life.
The best part? The seal doesn’t add shine. It keeps that natural, elegant finish intact!
When the microcement was done, the room felt completely different. But it wasn’t finished yet.
Bringing the Bathroom Together With Fixtures and Finishing Touches
This is the stage where everything clicks into place!
We installed the new floating vanity, which instantly opened up the floor space and made the room feel bigger.
The toilet went in next, followed by the sink, faucet, shower door, hooks, shelf, and all the meaningful little details that make a bathroom complete.
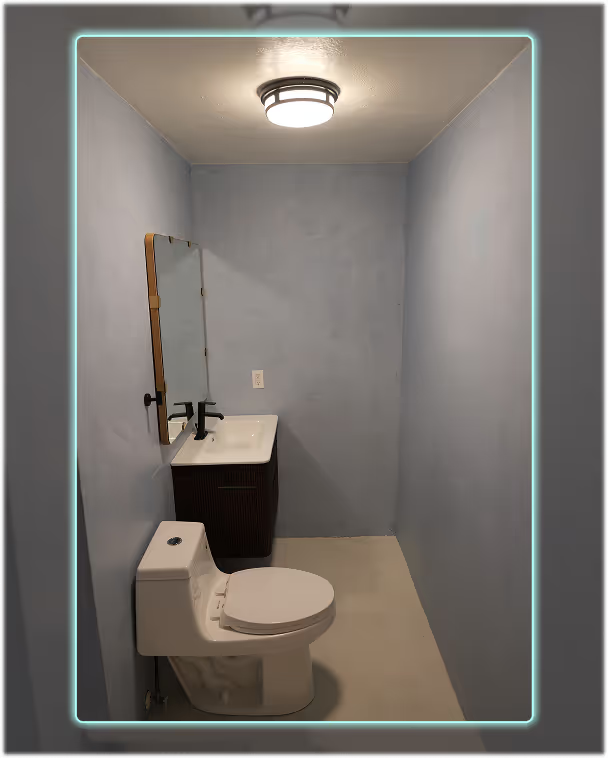
Then came the mirror, simple and sleek, perfectly suited for the setting. In a room with a continuous surface, a good mirror doesn’t just reflect light, it expands the whole atmosphere.
Once we connected the plumbing and got up the last bit of dust, this part of the home finally looked the way our client imagined it.
Calm. Minimal. Cohesive. An environment that felt like them!
Final Thoughts
Seeing this transformation come together is a display of the wonders microcement can do for a small bathroom.
It creates a stylish look without visual clutter, opens up the layout, and turns everyday routines into something a little more peaceful.
No grout lines. No busy patterns. Just a simple, beautiful finish that’s easy to care for and even easier to love.
If you’ve been thinking about refreshing your bathroom and want something with an updated appearance that’s actually practical, microcement is worth exploring.
And if you're curious how it might look in your home, we’d love to chat, answer questions, and help you imagine what a seamless transformation could look like for you!
Whenever you’re ready, we’re here!
Explore Recent Posts

Can You Put Microcement Over Tile?
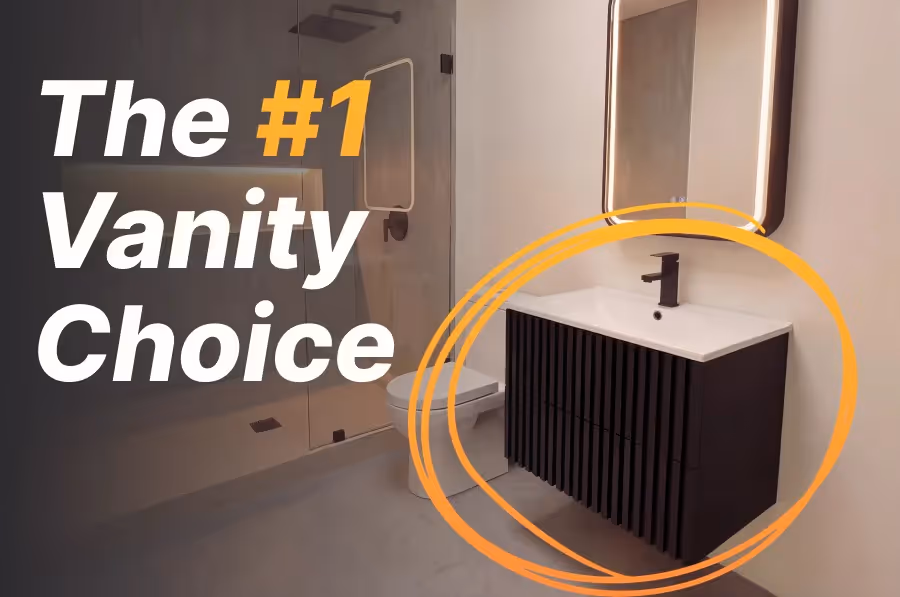
Why We Almost Always Recommend a Floating Vanity (And What They Actually Cost)