
The Story of Chris's Three Bathrooms: A West Seattle Bathroom Renovation
One West Seattle house, three bathrooms, one design. How we rebuilt a basement bath from the slab up and renovated the guest and master baths around it.


🎨 Style: Contemporary but timeless. White 3×12 subway tile, off-white walls, light wood vanities, one palette in every room
⏱ Timeline: Late July to mid-September 2026, three bathrooms in one house
🔨 Scope: Basement bath rebuilt from the slab up with a new walk-in shower; guest bath with a new tub and sliding glass door; master bath with a walk-in shower, niche and bench
📍 Where: West Seattle
Chris didn't have one bathroom problem. He had three.
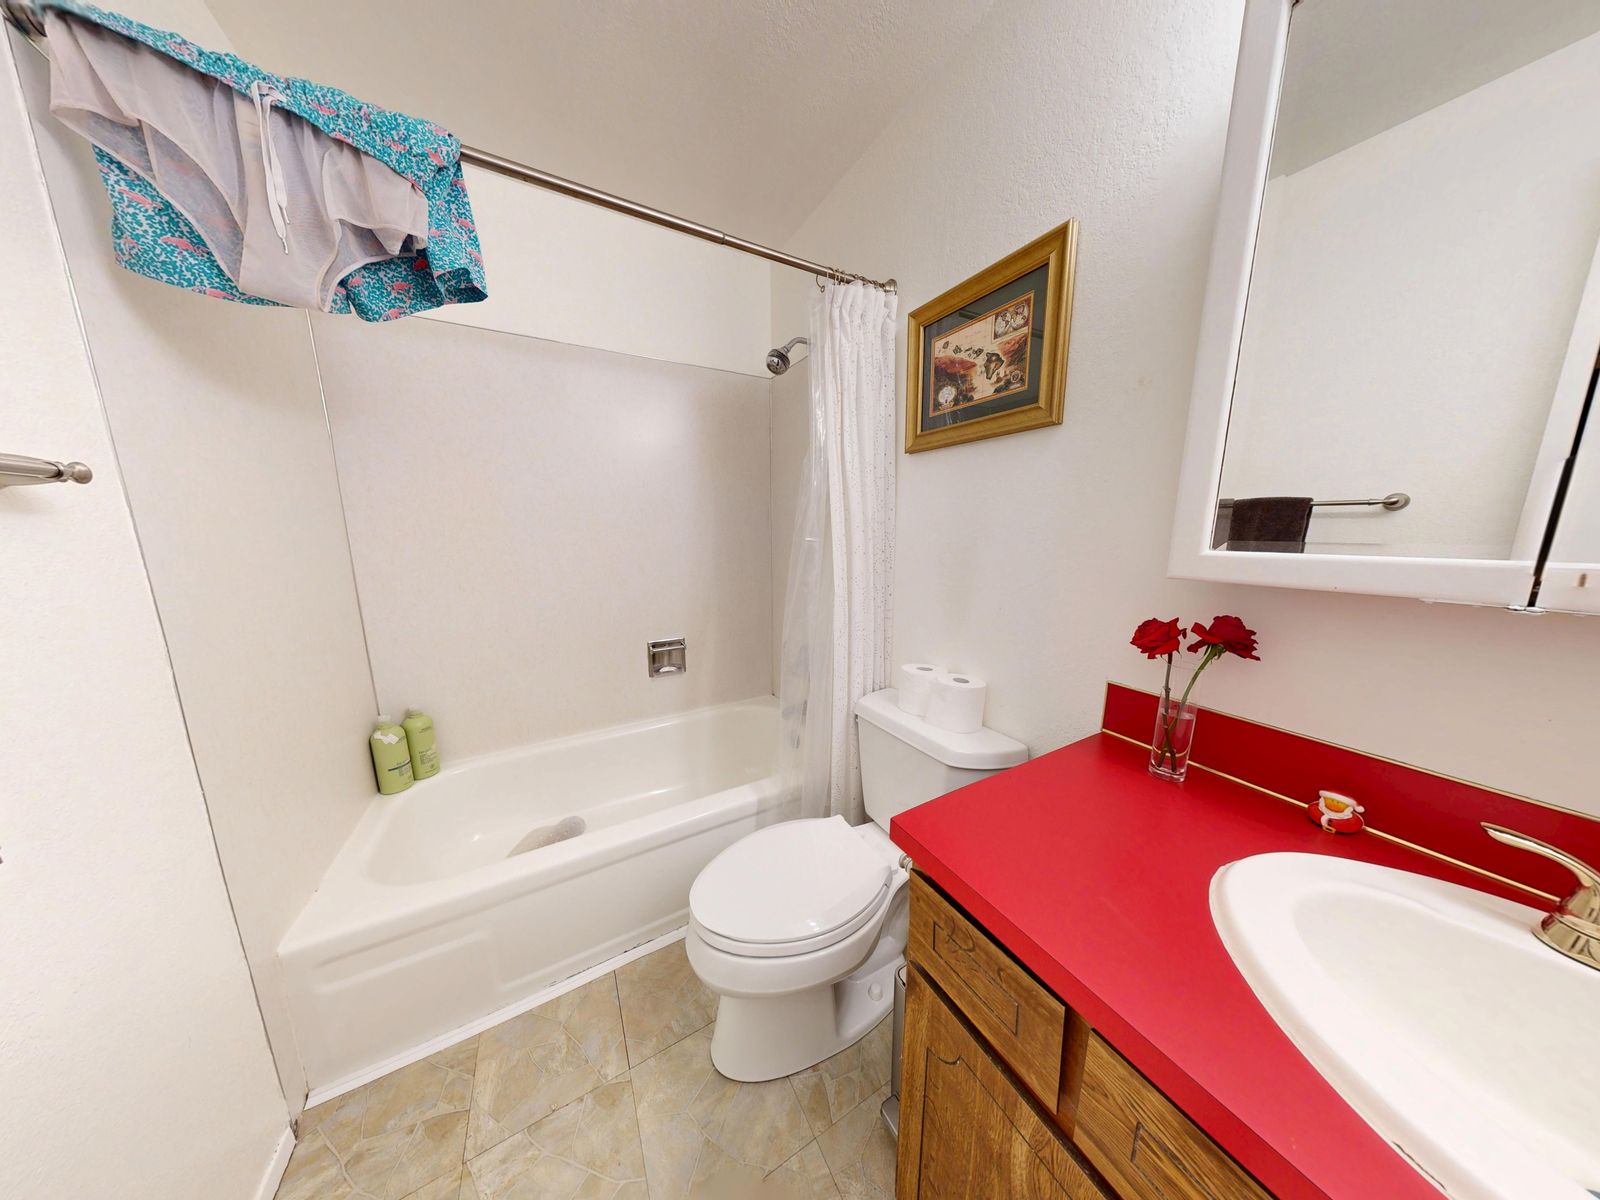
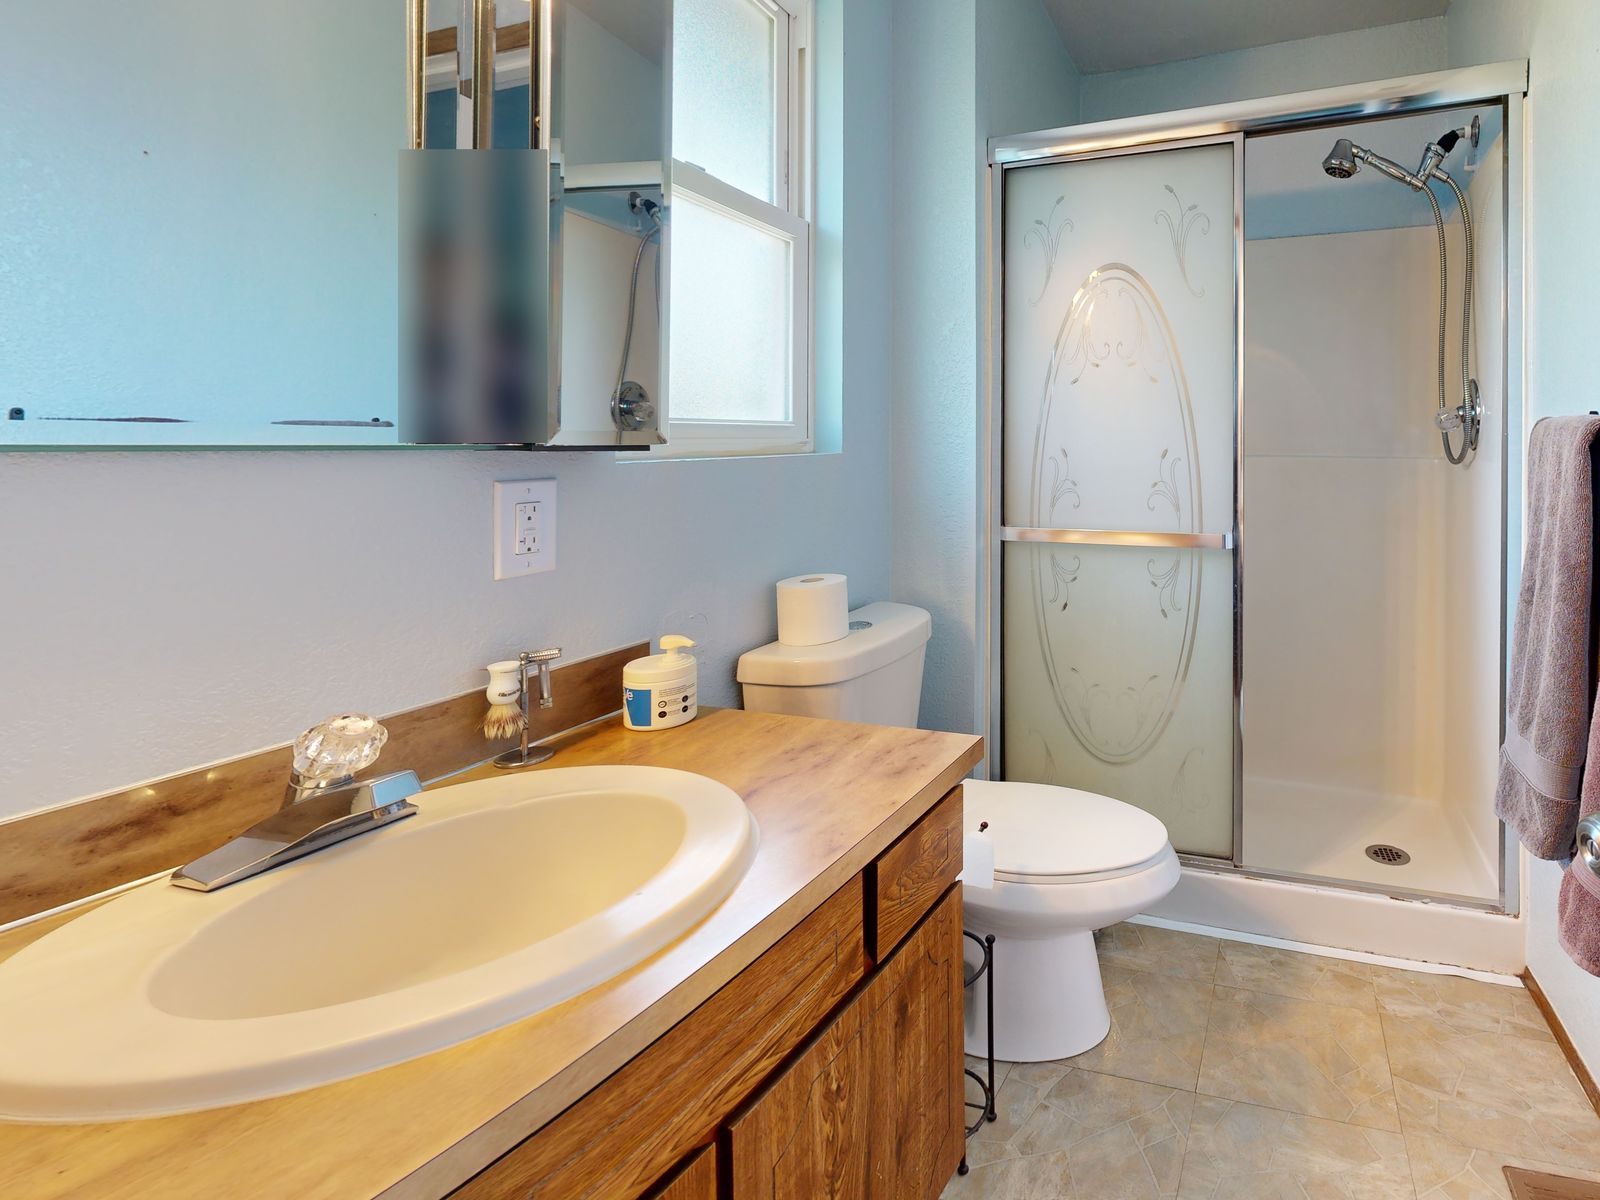
A basement bathroom with a concrete floor and nowhere for a shower to drain. A guest bath with a red laminate counter and a tired fiberglass tub surround. A master bath with a framed shower door, an almond sink and no exhaust fan at all.
His request came in through our website on April 20, with four photos attached. What he really asked for was harder than any single room: make all three feel like they belong to the same house.
The Before: Three Rooms, Three Different Problems
Stan walked the house on May 11 and scanned all three bathrooms in 3D with a Matterport camera, so every measurement behind the design and the pricing came from the actual rooms.
The basement was the priority. The water heater and laundry had already been moved out, which freed up the space, but the floor was bare concrete. There was water supply in the room and no drain anywhere a walk-in shower could go.
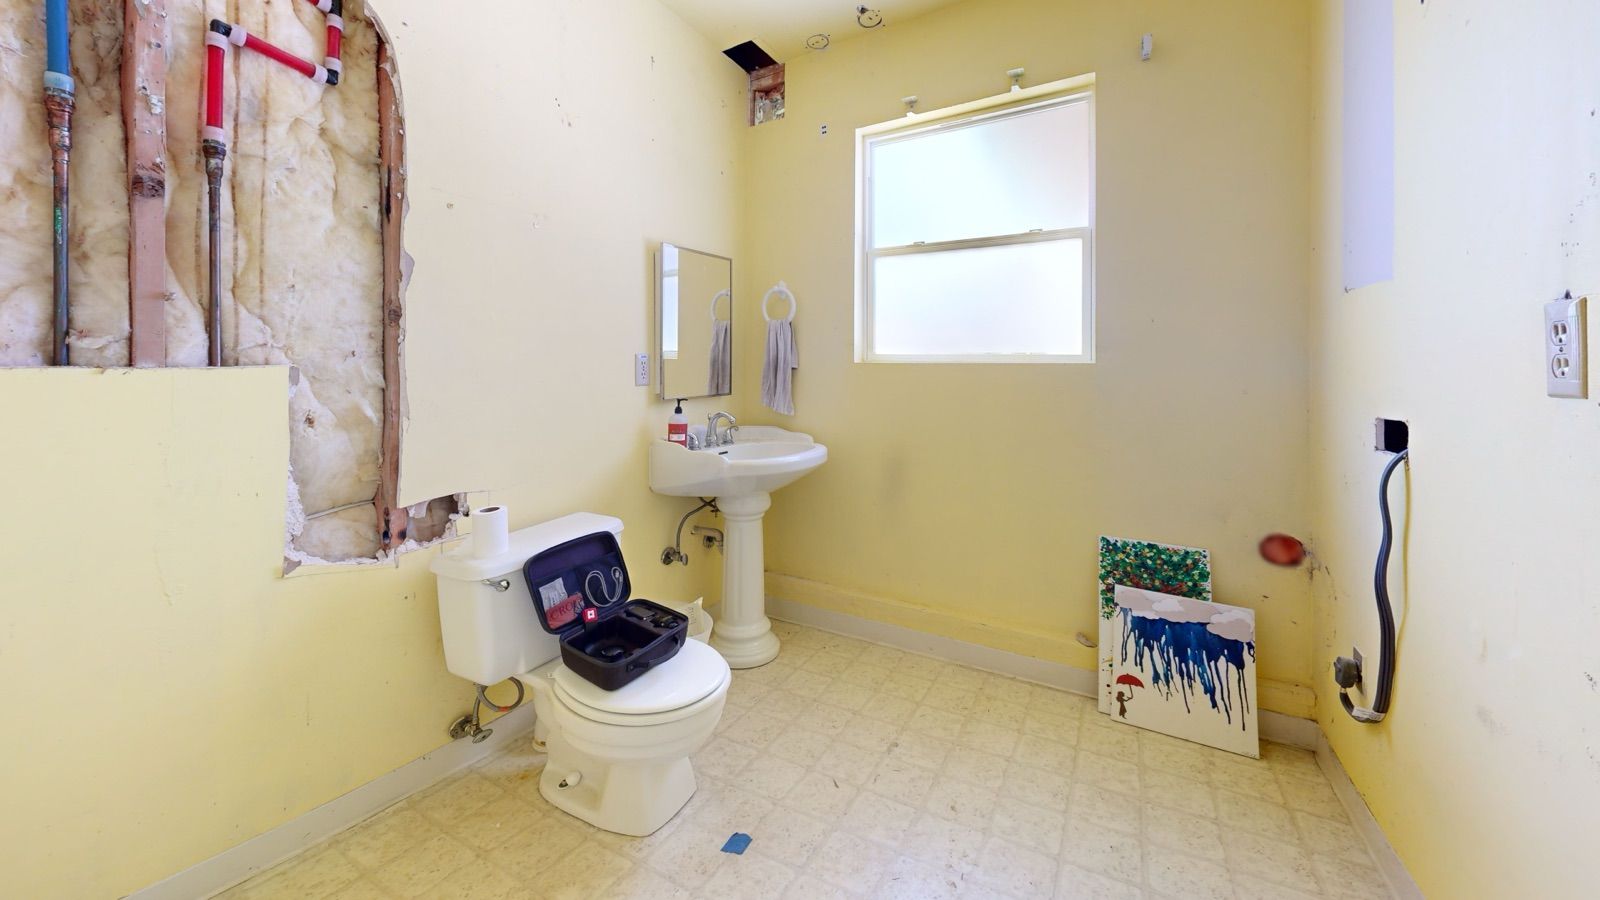
Upstairs, the guest bath was keeping its tub. Everything around the tub needed to catch up.
The master bath worked, but it had no exhaust fan. In a Seattle bathroom, that is a moisture problem waiting to happen.
One Design Brief for Three Bathrooms
On June 19, Chris sat down with Austin, Stan and Angelo, and we walked the 3D scan together room by room. By the end, Chris had given us the rules that would govern every decision after it:
- Contemporary but timeless. Something that still reads right in fifteen years.
- White subway tile, off-white walls, light vanities. A simple shell, so the personality comes from towels, art and things that can change.
- One palette in all three bathrooms. Same tile, same vanity family, same colors.
- Storage in the vanity, not a pedestal sink.
- Flat LED-lit mirrors instead of medicine cabinets.
- Grab bars in every shower and at the tub, with real blocking in the wall behind them.
- New exhaust fans in all three bathrooms, vented to the outside.
On July 1 we sent four revised quotes, one for each bathroom plus a back patio door. Each one was a single all-in number with materials included, and each came with the same promise: nothing gets ordered or changed without Chris approving it first.
The Basement: From the Slab Up
Demolition started July 24. That was the day the design decisions stopped being theoretical, because a shower in the basement needed a drain, and a drain meant cutting the concrete slab. You only get to cut a slab once.
The floor was specified in 12×24 large-format tile, and large tiles can't slope four ways toward a center drain without lippage and puddling. So we went with a linear drain along one wall, which lets the whole shower floor slope in a single plane. Same tile, cleaner drainage, one cut.
From there the room was rebuilt around it: a mud pan with a 24-hour flood test before any tile went on, white 3×12 subway on the shower walls, a fixed glass panel, a vanity with a quartz top and a flat LED mirror, a new toilet, a fan vented outside, and a grab bar anchored into blocking we framed while the walls were open. The old window on the shower wall came out, the opening was framed in, and the room got a new interior door.
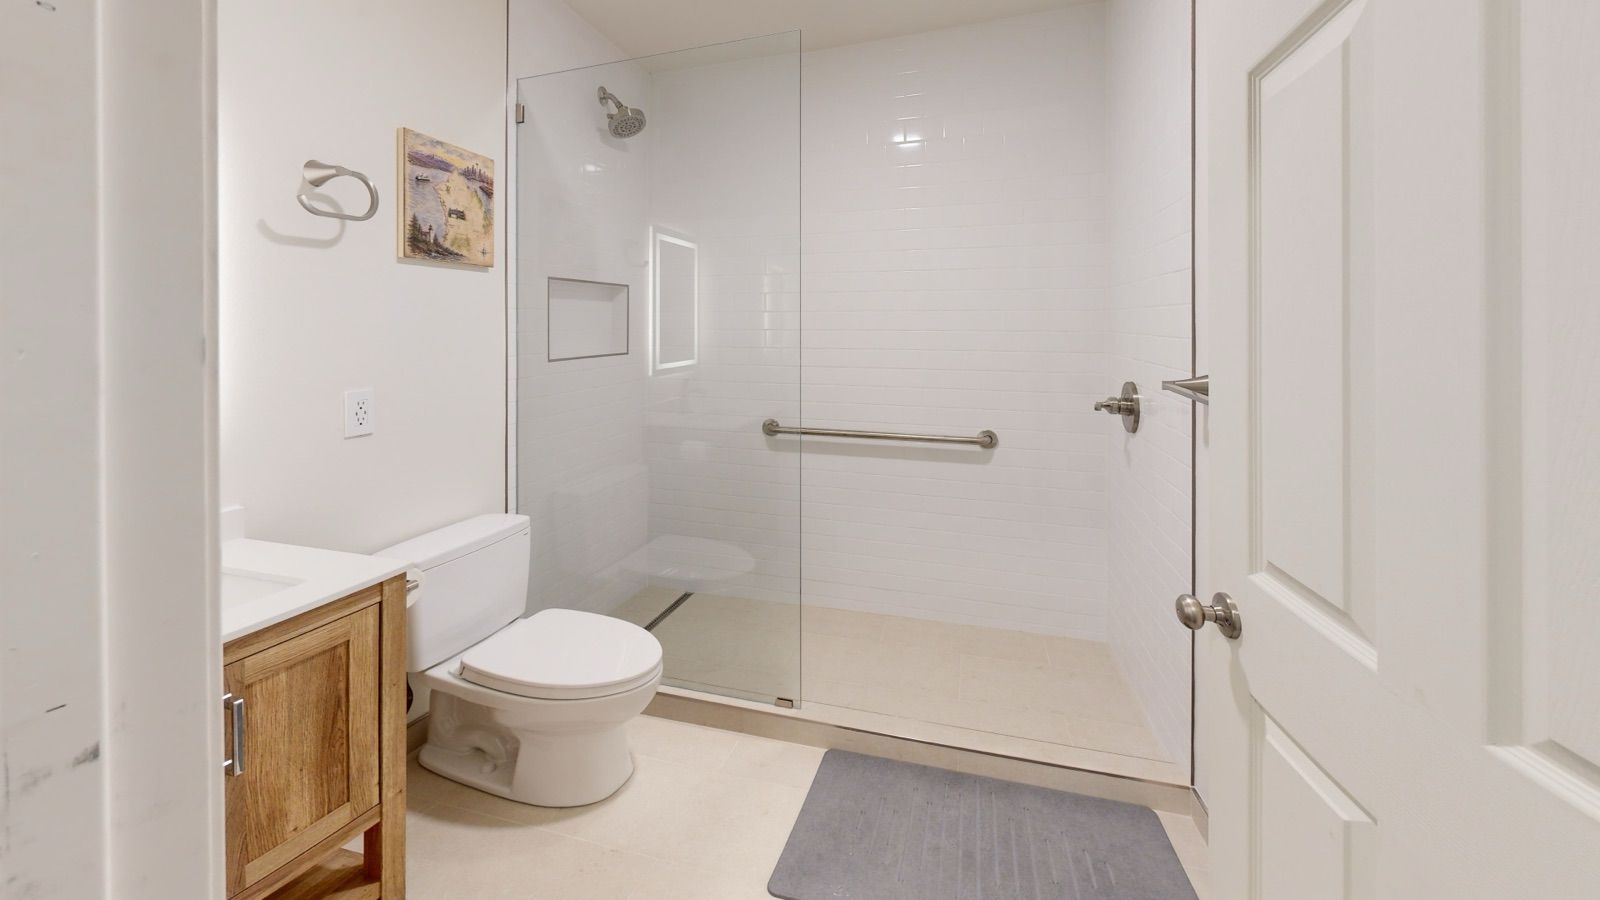
The basement bath was finished September 10.
The Guest Bath: Keeping the Tub, Changing Everything Else
The guest bath started August 5. We took it down to the studs, set a new alcove tub with brushed nickel fixtures, and tiled the surround in the same white subway as the basement. A semi-frameless sliding glass door replaced the shower curtain.
Along the way Chris approved a plumbing relocation change on August 13, and the room picked up a custom shower niche, a skim coat to smooth out the old wall texture, a grab bar at the tub, the same vanity family and LED mirror, and a new fan.
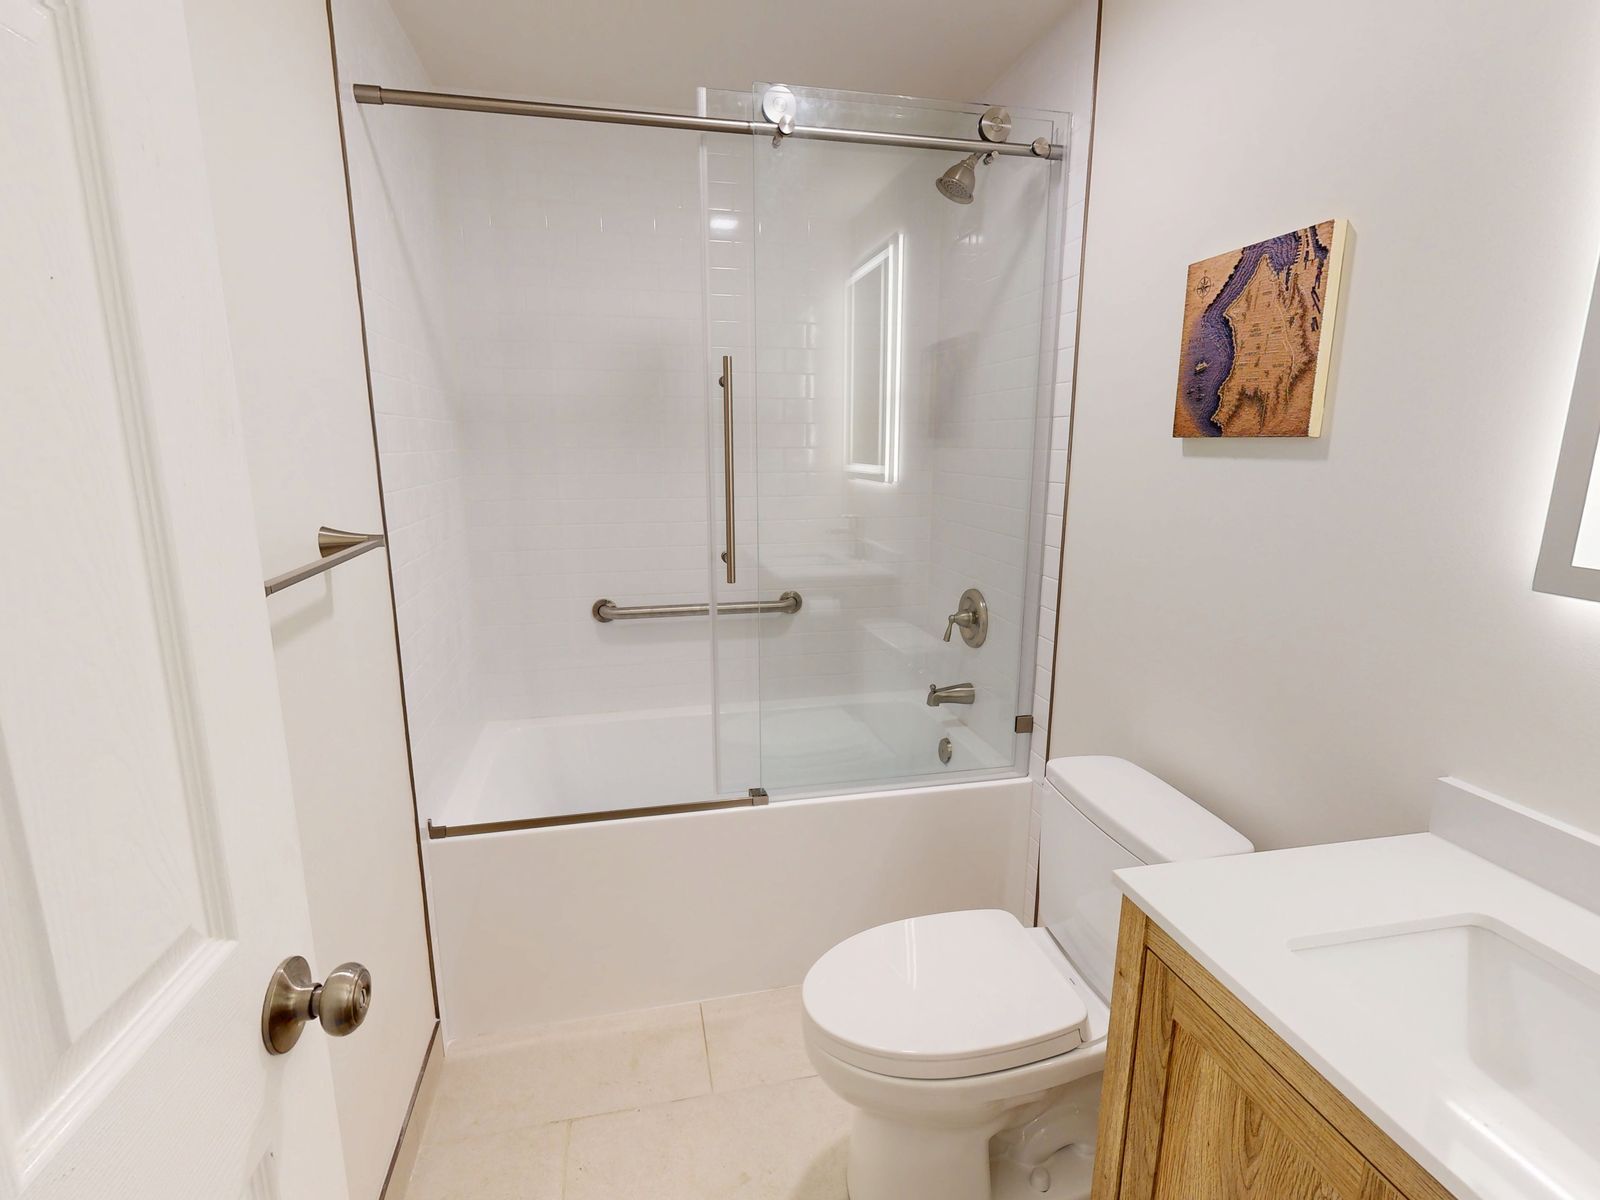
The guest bath was finished August 25.
The Master Bath: A Walk-In Built to Stay Dry
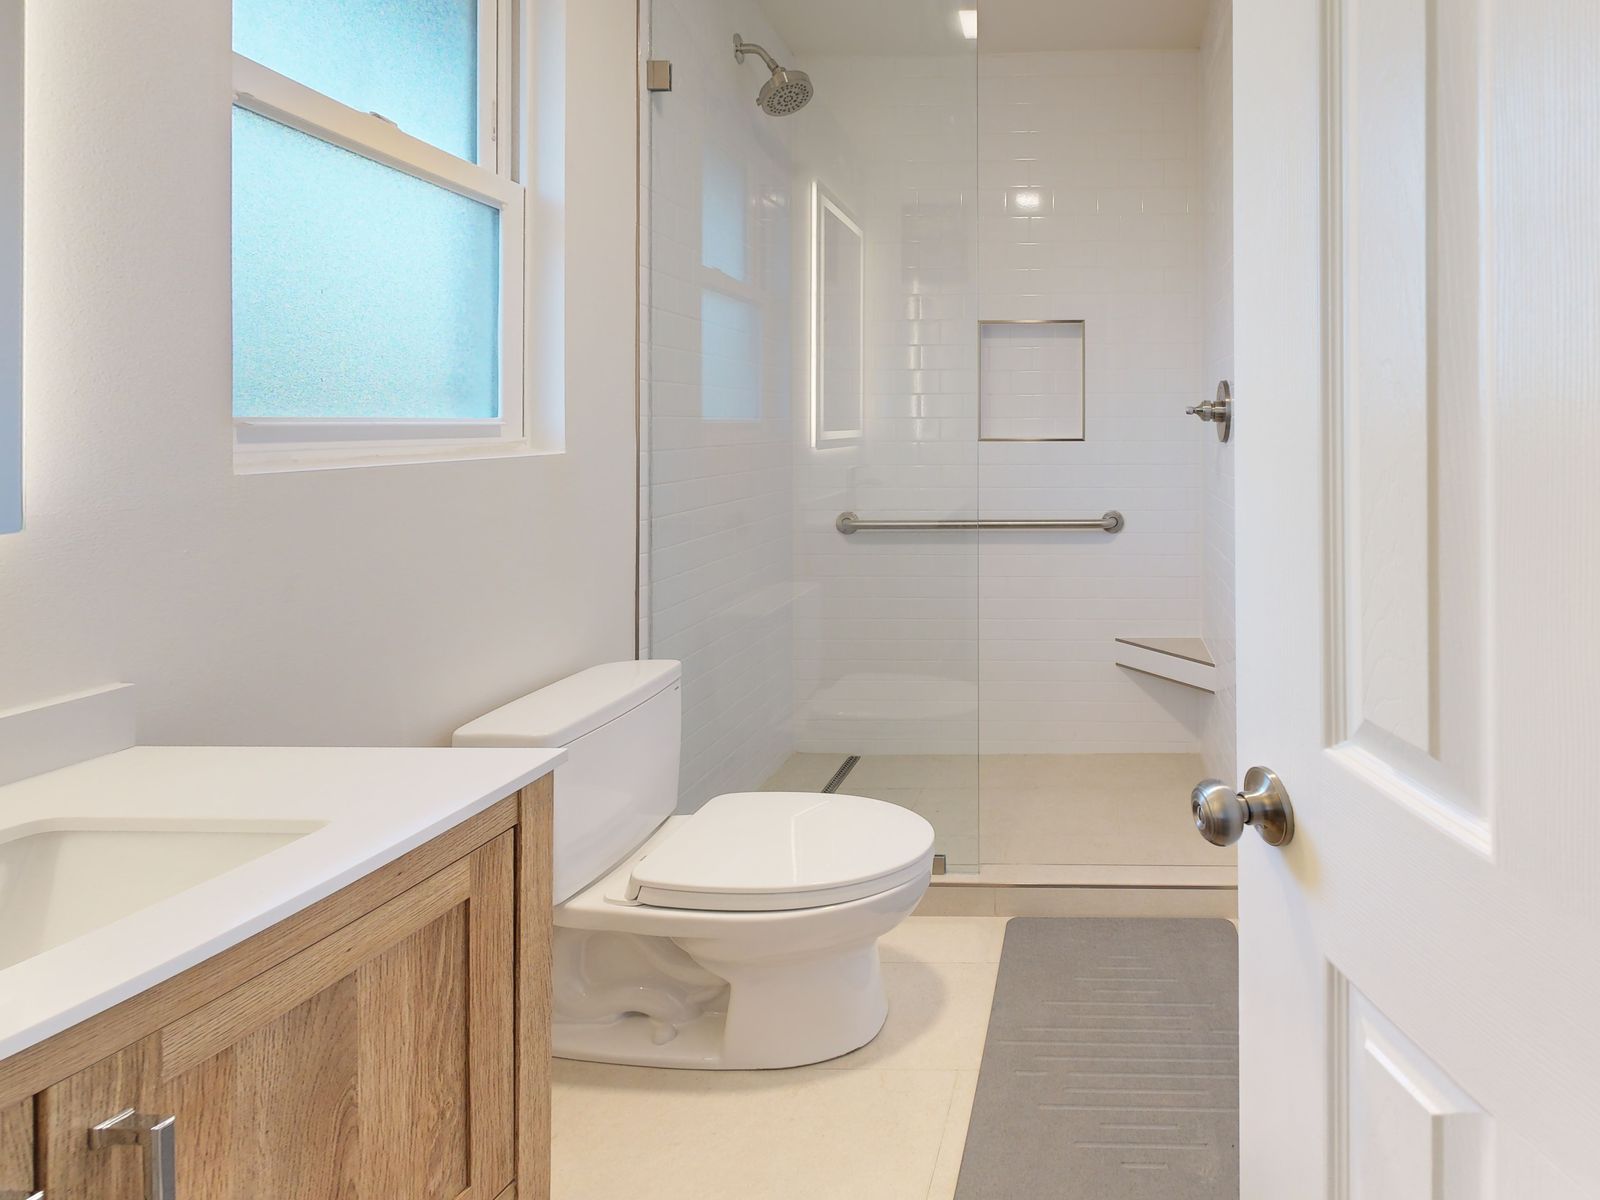
The master started August 24. The framed shower door and the almond sink came out, and in went a walk-in shower on a Schluter waterproofing system, flood-tested for 24 hours just like the basement pan. The walls got subway tile with a recessed niche, plus a custom bench and walk-in glass.
It finally got an exhaust fan, vented outside. And because three new bathrooms add up to a lot of new plumbing, the house now has whole-home leak detection: a Moen Flo smart water shutoff and leak sensors.
Planning more than one bathroom?
Let us scan your rooms and plan them together.
We start every project with a walkthrough and a 3D scan, so your plan and your price come from real measurements.
The Honest Bump: A Door We Got Wrong
The first thing we installed at Chris's house wasn't a bathroom at all. It was the sliding patio door, on July 22. That evening, Chris wrote that the slider “went in fast and the space already feels different.”
Then he flagged something. The operable panel was on the left. The original door slid from the right, the side with the light switches and the natural path out to the yard. The estimate never called out the handing, and our renderings showed the handle on the right.
He was right, and it was ours to get right. The next day we took the unit apart, returned it, picked up the correct right-hand door and reinstalled it the same day. DuetRight covered the full cost of the swap, and Chris's price didn't change. He had also asked us to hold the trim work until we agreed on a fix, which saved pulling finished trim back off.
What changed for good: every door and window we quote now spells out handing, swing and rough-opening size, so it's never something a client has to think to check.
A Client With a Sharp Eye
Chris watched this project closely, and the work was better for it. Before the basement ceiling closed up, he spotted fan wire splices sitting outside the junction box and asked us to tuck and clamp them first. He wrote up exactly how he wanted the heated towel rack wired. When something needed a second look, he said so, clearly and kindly.
He also noticed the things we work hardest to get right. In August, living in the house through all of it, he wrote to the crew:
“I really appreciate how clean you all keep the place. It makes a big difference with us living here while work goes on. You all have been very considerate.”
Three bathrooms back to back is a lot to live through. By mid-September he put it simply: “It has been a journey.” We think that's fair, and we're grateful he trusted us with the whole trip.
By the Numbers
- 3 bathrooms, 1 palette. The same subway tile, vanity family and flat LED mirrors in every room.
- 47 site visits between July 22 and September 18, nearly all of them with Angelo and Stan on site.
- About 270 square feet of subway tile on the shower and tub walls.
- 2 shower pans flood-tested for 24 hours before any tile.
- 3 exhaust fans vented outside and 3 grab bars with real blocking behind them.
Steal This for Your Own Renovation
- Pick your drain before anyone cuts concrete. Large-format floor tile in a shower works best with a linear drain along one wall. A center drain forces four-way slopes that big tiles fight.
- Doing more than one bathroom? Use one palette. The same tile and vanity family everywhere makes the house feel designed, not patched together, and keeps ordering simple.
- Add blocking while the walls are open. Wood blocking for a grab bar, or a future one, is nearly free during demolition and invasive to add later.
- Vent every bath fan outside. In a damp Seattle climate, a fan that dumps into the attic just moves the moisture problem.
- Get door and window handing in writing. Which side opens, which way it swings and the rough-opening size belong on the quote, not in a product photo.
Ready to Start Your Own Project?
Whether it's one bathroom or three, it starts the same way Chris's did: a short form, a walkthrough and a 3D scan, so the plan is built on real measurements. You can see more before and afters here, or start your project below.
Your turn
Life is hard. Bathroom remodels should be easy.
Tell us about your space and we will come take a look.
Explore Recent Posts
Inside a Capitol Hill Condo Kitchen Renovation: The Doorway Had to Move
The Story of Dina's Fence: A West Seattle Cedar Fence Replacement Where 85 Feet Became 150
