Reconstructed from project records · Approximate dimensions
Drag to turn · Scroll or pinch to zoom · Arrow keys to rotate
About this view
Explore the dark-tile tub, glass front, floor and neighboring door visible in the finish photographs.
This is partial room coverage. The photos do not establish a vanity, toilet or full outer perimeter. The entry swing, floor extent and tile module are illustrative.
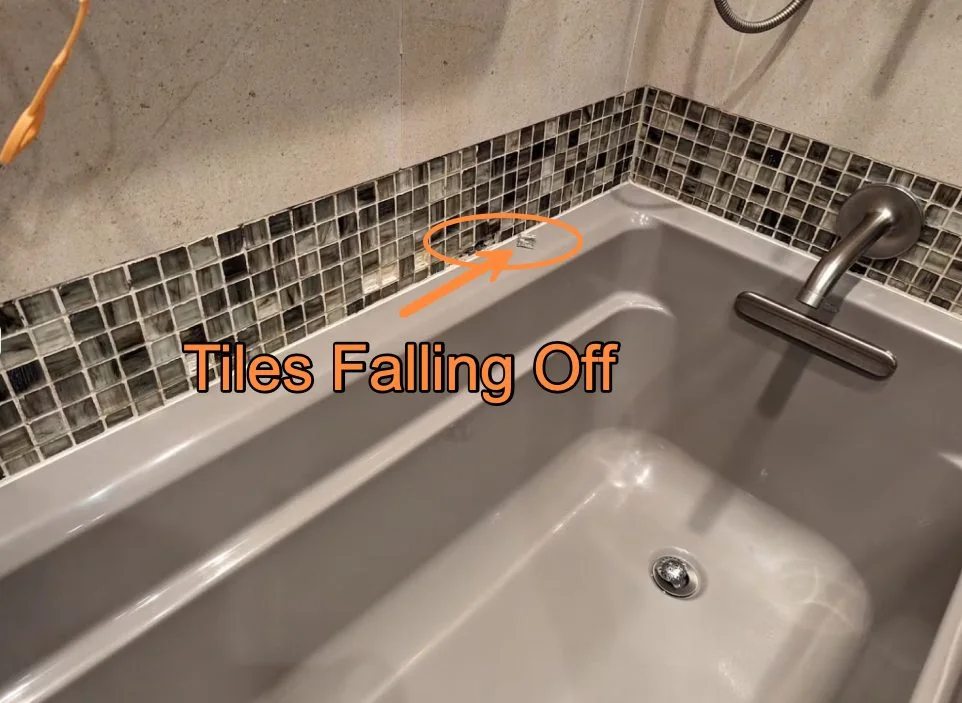
A few mosaic pieces had started lifting off this Seattle tub surround. The homeowner called about having them glued back. When we lifted the loose tile, the material behind it was soft enough to explain why more pieces kept letting go.
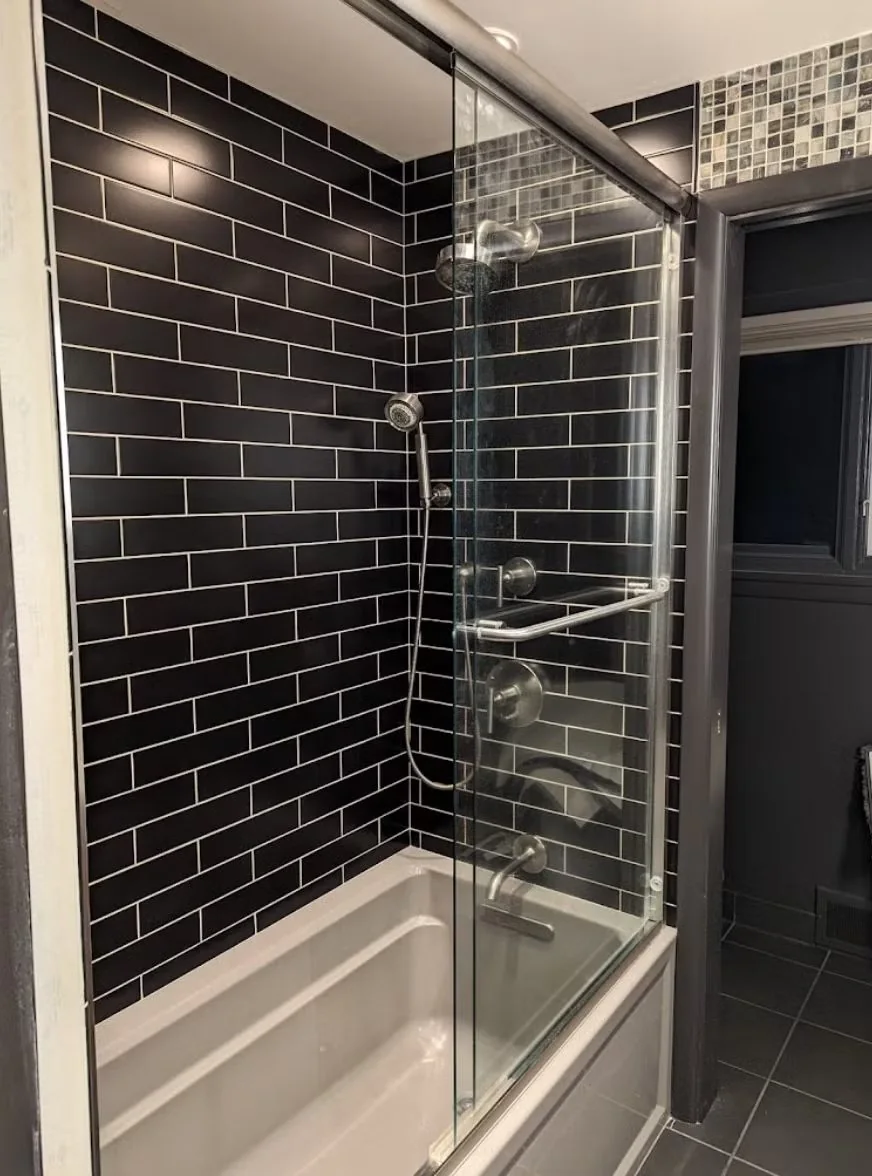
The rebuilt tub surround uses horizontal charcoal tile behind clear glass. The white tub stays distinct beneath the dark field.
Blender reconstructionProject photograph
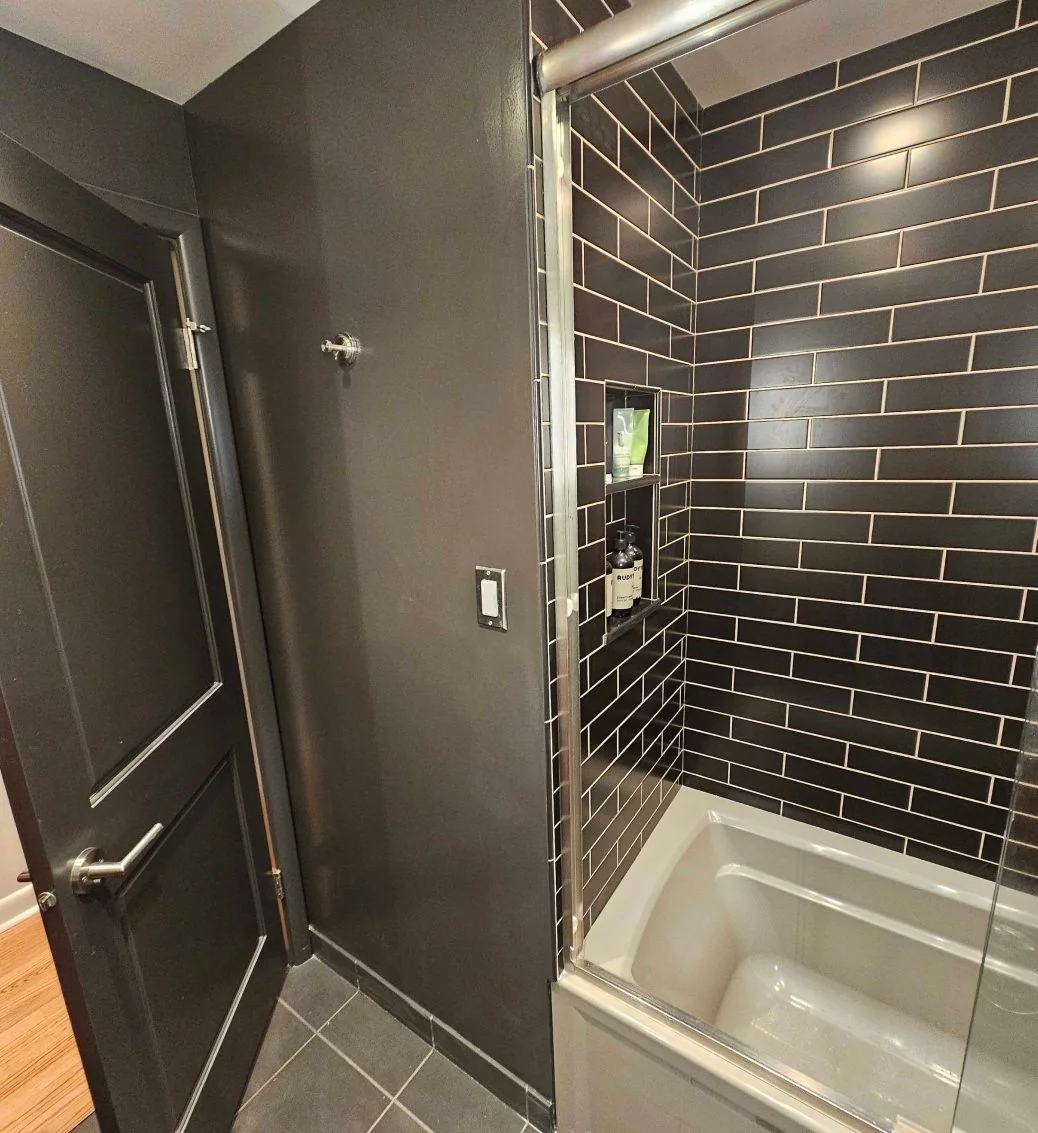
The site photographs show two different uses of small tile. A two-level storage niche sits in the short wall of the tub, and a narrow mosaic band runs above the dark doorway beside the glass.
DuetRight diagnosed the failed backing, replaced the assembly and set the new tile. The article gives no individual finish-design credit.
Reading the first loose tiles
The before photograph marks the narrow mosaic strip where the trouble first appeared. Much of the larger tiled surface around it still looked intact. From that view alone it would have been easy to price a handful of replacement tiles. The owner wanted to understand why the same thing kept happening before he spent money on a patch.
Behind the tile we found wet, mold-damaged backing. The existing waterproofing had allowed moisture into the wall. A fresh tile needs a sound surface to bond to, and the backing at this location could no longer provide one. Once the owner saw the condition, the scope changed from a small adhesive repair to rebuilding the surround.
Close-up of a tub surround with an arrow marking mosaic tiles coming loose from the wall.
A new surface behind the tub
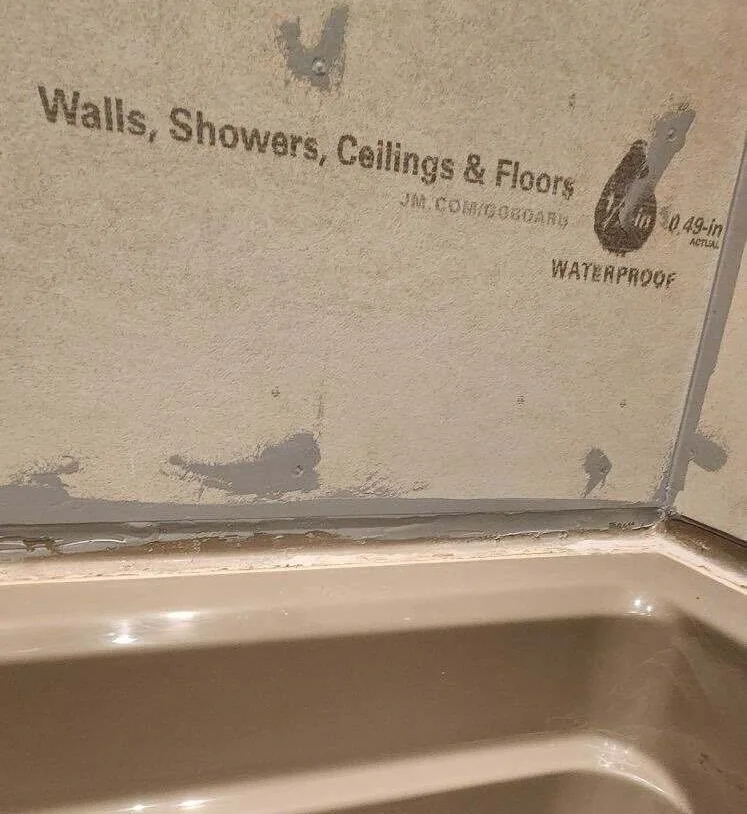
We stripped the surround back to the studs and replaced the damaged backing and insulation. The open-wall photograph in the sequence shows where the new waterproof foam backer meets the tub. This is the detail the finished tile eventually covered, and the part that made it possible to keep using the space as a tub and shower.
The new assembly put waterproofing behind the finish. The crew set the tile over that prepared surface and used epoxy grout in the joints. The rebuilt wall and the grout serve different purposes in this installation. One manages water behind the tile, while the other finishes the joints that the homeowner sees and cleans.
Waterproof backer board installed above the tub, replacing the failed tile backing.
Keeping a little of the original pattern
The completed surround still has a narrow mosaic band. Dark rectangular field tile gives that detail a different backdrop, and the pattern continues around the enclosure. A glass panel leaves the upper tilework visible above the white tub. The finished view shows a small change of color and scale doing most of the visual work.
The homeowner defined the priority when the damage was exposed. He wanted the underlying problem addressed as part of the repair. We diagnosed and rebuilt the assembly and installed the new finish.
Completed tub and shower in dark subway tile with a glass panel and mosaic accent strip.
A one-week turnaround
The homeowner had the shower back within a week. The before image shows where a few tiles fell loose. The construction image shows what it took to give their replacements a firm, waterproofed base. Together they explain how a repair that began at a mosaic strip became a complete tub surround.
Blender detail study
Charcoal subway above the tub.
Reconstruction from project records · November 2026
A closer look in motion
Five-second Blender camera study · Charcoal subway above the tub
From the site
The project in photographs.
Finished shower in charcoal subway tile with a mosaic accent band and a glass panel.