Reconstructed from project records · Approximate dimensions
Drag to turn · Scroll or pinch to zoom · Arrow keys to rotate
About this view
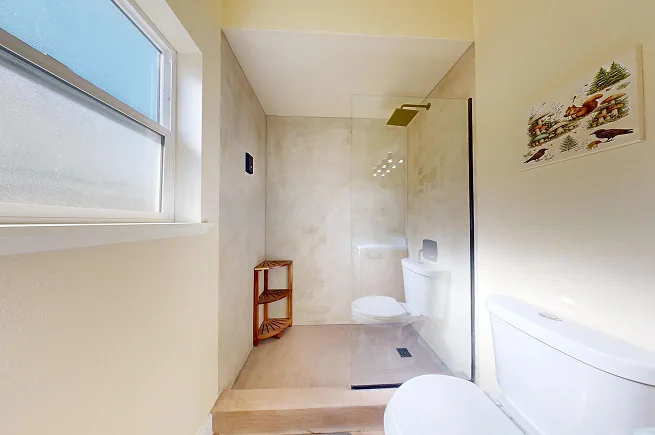
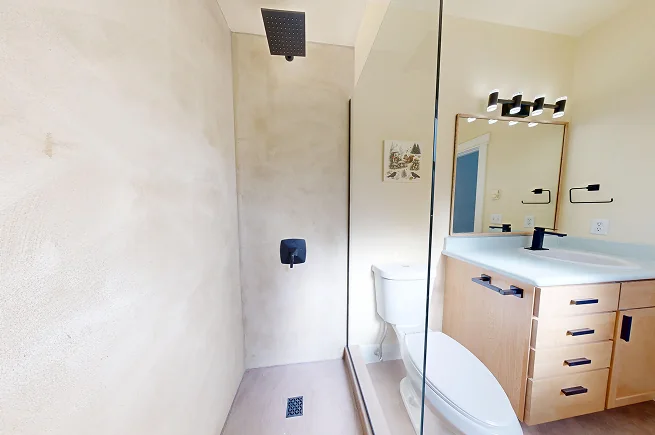
The continuous floor links the shower, toilet and refinished vanity opposite the frosted window.
The article and opposite-facing photos establish the fixture grouping, oak-framed mirror and warm continuous finish. Room length, threshold, joinery and window position are estimated.
The tub in this West Seattle rental had already been reglazed once. When the coating started to fail, the owner had a choice to make about the next tenant's bathroom. He asked us for a walk-in shower with fewer joints to clean and a finish worth carrying through the rest of the room.
The team carried the hand-applied microcement from the walls onto the sloped pan. That left the edge of the glass and the dark shower fittings as the main lines in the room.
Blender reconstructionProject photograph
The doorway photo shows the wooden corner stand to the left of the shower. The opposite view shows the square black mixer beneath the rain head and the dark rectangular drain in the continuous floor.
The owner set the brief for a durable rental bathroom. DuetRight built the shower and carried the material and wood details through the room.
Following the old shower door
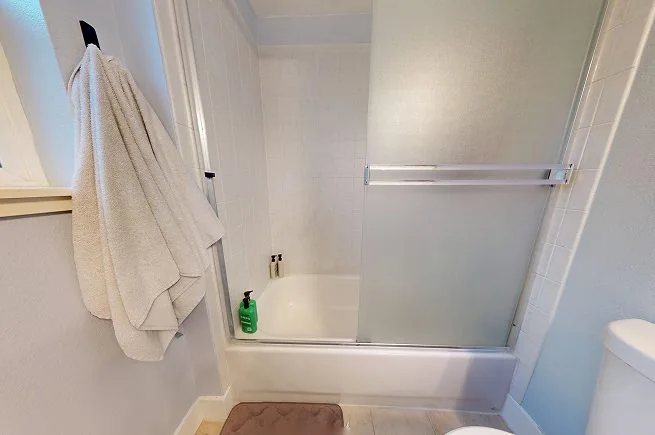
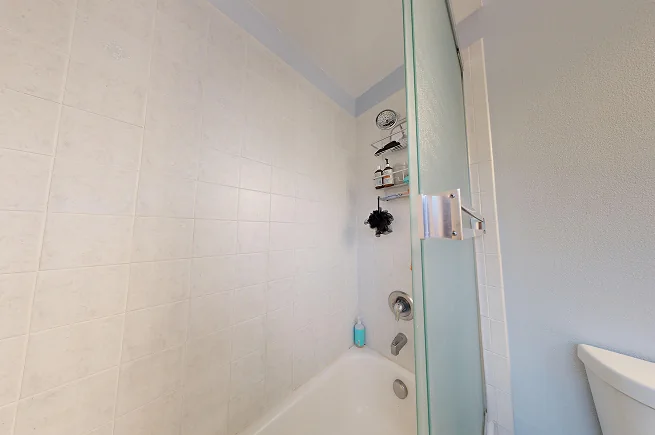
The before photograph shows why the tub enclosure was awkward to live with. A tall tub wall and a sliding glass door occupied the same narrow opening. The metal track collected grime. Inside, a change from tile to tub added another joint to look after. The owner wanted to simplify what a tenant would use every day and what he would have to maintain between tenancies.
A fixed piece of glass could take the place of the slider. Microcement would let us finish the wall, pan and bathroom floor in the same warm tone. Taking those two decisions together removed the overhead door track and let the floor run visually into the shower.
The original tub-shower combo
Building the pan below the finish
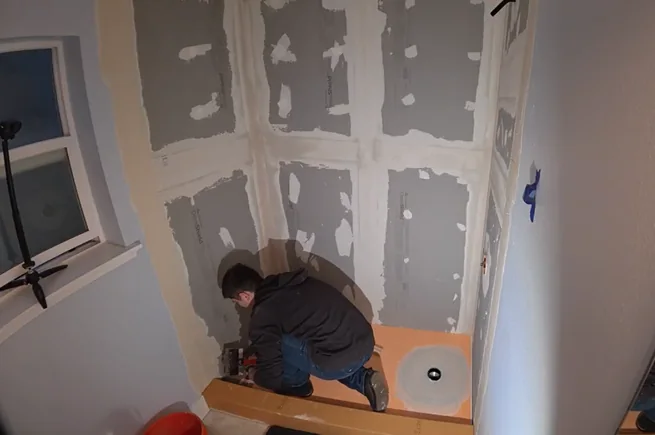
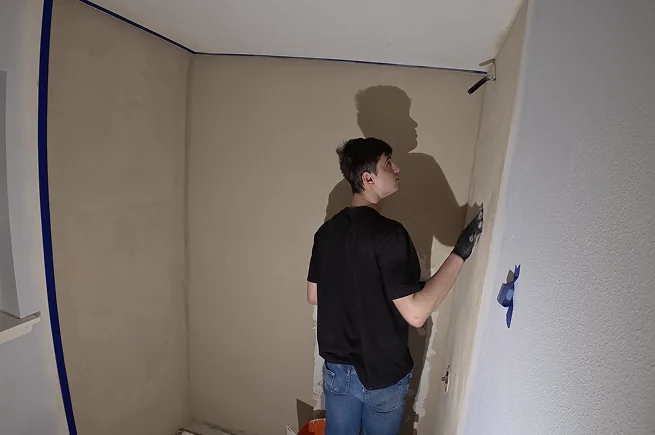
The old tub and its surround came out to the studs. In their place we built a sloped mortar-bed pan with a PVC liner and waterproofed the shower. We held water in the pan for 24 hours before applying the finish. The photograph of the crew working on the pan records the part of this room that disappeared under the microcement.
We hand-applied two coats to the shower walls, then carried the finish across the pan and onto the main floor. Once it cured, we sealed it with a matte polyurethane topcoat. A fixed frameless panel went in after the plumbing and valve trim were fitted and tested.
Working the shower pan and waterproofing
Keeping the mirror and the counter
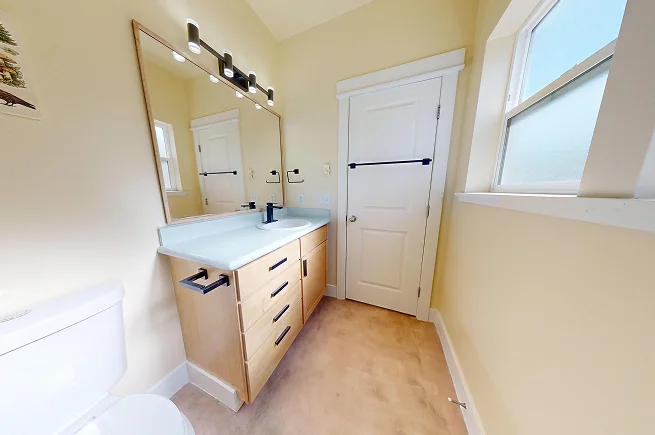
Across from the shower sat a vanity that could still serve the room. We surfaced the existing counter in a matching tone, changed the pulls and fitted a low-profile matte black faucet. A black light above the mirror repeats that finish.
The existing mirror stayed. We built a frame for it in oak. In the completed vanity photograph, the oak frame echoes the cabinets, and the pale counter carries the shower finish across the room. Reusing the mirror and counter also kept two serviceable pieces out of the demolition pile.
The new and improved vanity space
What a tenant sees at the door
The new sightline goes to a rain head and a single pane of clear glass. Below it, the sloped shower floor and the surrounding floor read as one surface. The finished photographs show that continuity in daylight and under the vanity light. The owner gained a bathroom with fewer edges and tracks to clean, along with the open shower he wanted to offer his tenants.