
Shower Niche Guide: Sizes, Placement, Waterproofing and Cost
Shower niche sizes that fit between studs, where to place one, how to waterproof it so it doesn't leak, finish options, and when it's worth adding.

What is a shower niche, and what size should it be? A shower niche is a recessed shelf built into the shower wall, between the studs, so shampoo and soap sit flush with the tile instead of on a hanging caddy. In a standard 2×4 wall framed 16 inches on center, the open space between studs is about 14½ inches wide and 3½ inches deep, so the most common niches are 12×24 or 14×24 inches (tall) or 24×12 (wide, which needs a small header). Put it on a side wall out of the direct spray, at roughly chest height, and never on an exterior wall. The part that matters most is the one you can’t see: the niche has to be waterproofed as one continuous system with the rest of the shower.
In our Seattle cost guide we list a built-in niche as one of the best upgrades for the money: permanent storage instead of a caddy, added while the shower is already open. This guide covers sizing, placement, waterproofing, finishes and cost, plus the mistakes that show up in older showers.
Shower niche sizes: what actually fits
Niche size is set by the wall framing, not by preference. Here’s how the common options compare:
| Niche | Typical size | Framing |
|---|---|---|
| Single-bay tall | 12×24 or 14×24 in | Fits between two studs, no cutting |
| Single-bay small | 12×12 or 14×14 in | Fits between two studs |
| Wide / horizontal | 24–36 in wide × 12 in tall | Cuts a stud; needs a header and sill framed in |
| Double-shelf tall | 14×24 to 14×36 in with a shelf | Between studs; shelf splits tall and short bottles |
Depth is almost always about 3½ inches in a 2×4 wall, minus the backer board and tile, so plan on roughly 3 to 3¼ inches of usable depth. That holds most shampoo bottles. Big pump bottles may need a wider, shorter niche rather than a deeper one.
Size it to the tile. The cleanest niches line up with the tile layout, so the top and bottom land on grout lines and you don’t end up with thin slivers of tile around the opening. The right order is to lay out the tile first, then frame the niche to match.
Where to put a shower niche
- Side wall, out of the spray. A niche facing the showerhead fills with water and soap scum. The side wall next to the valve, or the wall across from the door, usually works best.
- Chest height. Roughly 48 to 60 inches off the shower floor is comfortable for most adults. In a tub-shower, keep the bottom of the niche at least a foot above the tub rim so it isn’t in the splash zone.
- Not on an exterior wall. An exterior wall is full of insulation, and cutting a niche into it leaves a cold pocket. In Seattle’s damp climate that is where condensation and mold start. If the only open wall is exterior, a tiled ledge or corner shelf is the better choice.
- Not on the plumbing wall without checking. The valve wall has supply lines running through it. A niche there is possible, but the plumbing has to be located first.
- Visible from the door, or hidden. If the niche is visible when you walk in, treat it as a design feature (accent tile or stone). If you’d rather not see bottles from the doorway, put it on the wall you face while showering.
Rebuilding a shower?
Plan the niche with the tile, before anything is cut.
Scope in writing, waterproofing first, and a niche that actually lines up with your grout lines.
Waterproofing: where niches fail
A niche is a box cut into the wettest wall in the house. It has more corners and seams than any other part of the shower, and that is exactly where water gets in. When an older shower fails, the niche is one of the most common culprits.
- One continuous membrane. The waterproofing inside the niche has to tie into the waterproofing on the wall around it. That means sealed inside corners and overlapped seams, not just grout and caulk.
- A sloped sill. The bottom of the niche should pitch slightly toward the shower so water runs out instead of pooling against the back wall.
- Prefabricated inserts help. Factory-made waterproof niche inserts remove most of the seams. A site-built niche can be just as good, but only if every corner is treated.
- Check it before tile. Waterproofing should be inspected before any tile goes up. Once the tile is set, a leak is invisible until the damage shows somewhere else.
If your current niche has cracked grout, loose tile or a soft wall underneath, read when shower tile failure signals hidden mold before you regrout. More on our approach: how we waterproof Seattle showers.
Finish options
- Same tile as the wall. Quietest look; the niche disappears into the shower.
- Accent tile on the back. A different tile or color on the back panel only. An easy way to add character without a busy wall.
- Stone or quartz sill. A single solid piece for the bottom (and sometimes the shelf) is easier to clean than grout lines and resists chipping.
- Metal edge trim. Clean edges on the opening instead of bullnose tile; matches modern fixtures.
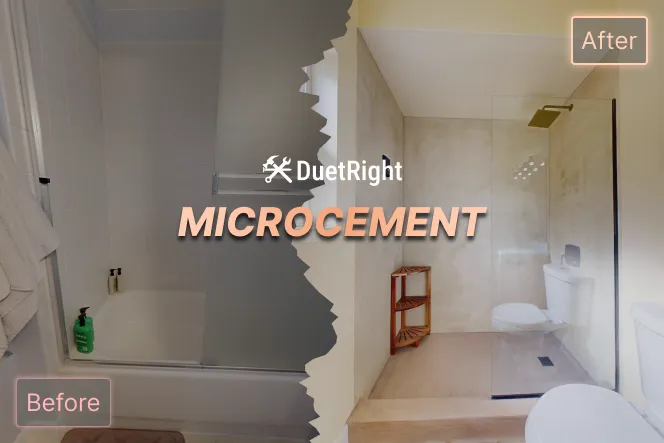
- Microcement. In a microcement shower the niche is finished seamlessly with the walls: no grout lines at all.
- LED strip. A small waterproof light strip in the top of the niche works as a night light. It needs to be planned before the wall is closed.
What does a shower niche cost?
The cost depends almost entirely on when you add it.
- During a shower rebuild or tub-to-shower conversion: the wall is already open, so a niche adds framing, waterproofing and some tile cutting, and it shows up as its own line in your written scope.
- Retrofitting into an existing tiled shower: this means cutting into finished tile and waterproofing, then patching it so the new waterproofing ties into the old. It’s possible, but it’s rarely the best value. If that wall is close to the end of its life anyway, a rebuild is usually the better money.
For full shower pricing, see our cost explorer and the Seattle bathroom renovation cost guide.
Shower niche FAQ
Can you add a niche to an existing shower?
Yes, but it means cutting through finished tile and the waterproofing behind it, then tying new waterproofing into old. Done carelessly, it creates a leak in a shower that didn’t have one. The best time to add a niche is when the shower is being rebuilt.
How deep is a shower niche?
About 3½ inches of framing in a standard 2×4 wall, or roughly 3 to 3¼ inches of usable depth after backer board and tile.
Can a shower niche go on an exterior wall?
We don’t recommend it. Cutting into an insulated exterior wall creates a cold spot, and in Seattle’s climate that invites condensation and mold behind the tile.
Should a shower niche be horizontal or vertical?
Vertical niches fit between studs with no framing changes and hold tall bottles. Horizontal niches look great with large-format tile but need a stud cut and a header. Pick based on your bottles and your tile layout.
Is a niche better than a corner shelf?
A niche keeps everything flush and out of the way. A corner shelf or ledge is the right call when the only available wall is exterior or full of plumbing.
Thinking about a new shower?
We’re a West Seattle team, and we put the scope and price in writing after a walkthrough. A niche is part of that conversation, along with the tile layout. Start your project or call (206) 413-8156.
Explore Recent Posts

Bathroom Remodel Checklist for West Seattle Homeowners
How to Choose the Right Contractor in Seattle: It Goes Both Ways